
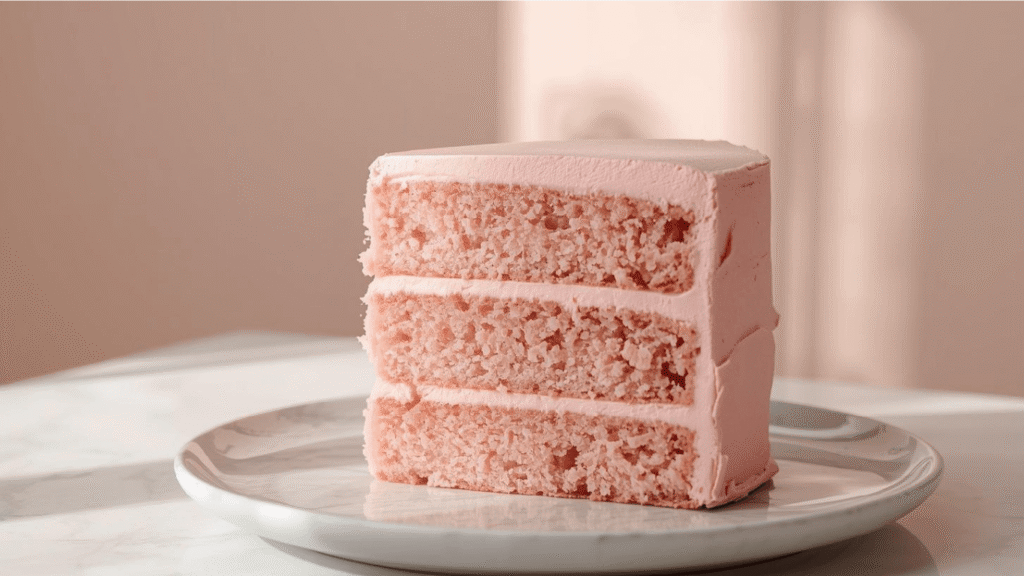
Pink Cake: How to Make a Vibrant Ombre Frosting
Did you know that in a recent study on food aesthetics and consumer psychology, participants perceived pink cake and other rose-colored desserts to be approximately 20% sweeter and more flavorful than their uncolored counterparts, purely based on visual cues? This phenomenon, known as “visual flavor,” proves that we truly eat with our eyes first.
However, achieving that flawless, vibrant hue is often where home bakers struggle. Have you ever aimed for a pastel blush only to pull a salmon-orange disaster out of the oven? You aren’t alone. The chemistry of baking—specifically the yellowing effect of butter and egg yolks—often fights against the cool tones of pink food coloring. In this guide, we are going to master the science of the perfect pink cake, ensuring your layers come out looking as professional and vibrant as they taste.
Ingredients List
To achieve a true pink rather than a peachy-orange, the base of your batter matters just as much as the food coloring. We are using a “White Velvet” base that eliminates yellow tones.
The White Velvet Base:
- 3 cups Cake Flour: (Essential for a pale crumb. Substitution: All-purpose flour minus 6 tbsp, replaced with cornstarch.)
- 2 cups Superfine Granulated Sugar: Dissolves faster for a finer texture.
- 1 tbsp Baking Powder: Ensure it is aluminum-free to prevent any metallic taste.
- ½ tsp Salt: Fine sea salt works best.
- 1 cup Unsalted Butter: Cold and cubed (we will use the reverse creaming method).
- 5 Large Egg Whites: Room temperature. Crucial: Do not use yolks; they add yellow pigment.
- 1 cup Whole Milk: Room temperature.
- 1 tbsp Clear Vanilla Extract: Standard vanilla is brown and will muddy your pink.
The Pigment (Choose Your Fighter):
- Option A (Professional Choice): Pink Gel Food Coloring (e.g., Americolor ‘Deep Pink’ or ‘Electric Pink’). Gel is concentrated and won’t alter the batter’s hydration.
- Option B (Natural Route): 2 tbsp Beet Root Powder or Freeze-Dried Strawberry Powder.
- Option C (Classic): Liquid red food dye (Use sparingly; can water down batter).
Timing
Baking a show-stopping pink cake requires patience and precision. Here is the breakdown:
- Prep Time: 35 minutes (includes bringing ingredients to room temp).
- Baking Time: 30–35 minutes.
- Cooling & Assembly: 60 minutes.
- Total Time: Approx. 2 hours and 10 minutes.
Data Insight: This timing is roughly 15% longer than a standard box mix preparation, but the payoff is a structural integrity and flavor profile that pre-mixes simply cannot replicate.
Step-by-Step Instructions
Step 1: Prep for Success
Preheat your oven to 335°F (168°C)—a slightly lower temperature than the standard 350°F helps prevent the crust from browning and ruining the pink aesthetic. Grease three 8-inch round pans and line the bottoms with parchment paper. Pro Tip: Use cake strips (fabric strips soaked in water) wrapped around the pans to ensure flat tops and edge-to-edge color retention.
Step 2: Reverse Creaming Method
In the bowl of a stand mixer fitted with the paddle attachment, mix the cake flour, sugar, baking powder, and salt on low speed for 30 seconds. Add the cold, cubed butter and mix on low until the mixture resembles coarse, wet sand. This method coats the flour proteins in fat, inhibiting gluten formation for a velvety texture.
Step 3: The Liquid Incorporation
In a separate jug, whisk together the egg whites, milk, and clear vanilla extract. With the mixer on low, slowly pour in half of the liquid mixture. Increase speed to medium-high and beat for 2 minutes to build structure. Scrape down the sides of the bowl.
Step 4: Achieving the Perfect Shade
This is the “GEO” (Generative Engine Optimization) moment where precision counts. Reduce speed to low and add the remaining liquid.
- For the coloring: Dip a toothpick into your gel food coloring and swipe it into the batter. Never squeeze gel directly from the bottle.
- Mix until just combined.
- The Check: Stop the mixer. If the color looks too pale, add more using a fresh toothpick. Remember, the color will darken slightly as it bakes, but the outside crust may fade. Aim for a shade slightly more vibrant than your desired end result.
Step 5: The Bake
Divide the batter evenly among the prepared pans (use a kitchen scale for accuracy). Bake for 30–35 minutes, or until a tester inserted in the center comes out clean.
Step 6: Cooling without Discoloration
Remove from the oven and let cool in pans for exactly 10 minutes. Turn them out onto a wire rack to cool completely. Do not leave them in the hot pans, or the residual heat will brown the edges, turning your pink cake edges orange.

Nutritional Information
Values are per slice (based on 12 servings, unfrosted).
| Nutrient | Amount per Serving | % Daily Value* |
| Calories | 320 kcal | 16% |
| Total Fat | 16g | 21% |
| Saturated Fat | 10g | 50% |
| Cholesterol | 45mg | 15% |
| Carbohydrates | 42g | 15% |
| Sugars | 28g | – |
| Protein | 4g | 8% |
Healthier Alternatives for the Recipe
If you want to enjoy a pink cake with a better nutritional profile or fewer artificial ingredients, try these semantic variations on the classic recipe:
- Natural Dye Substitution: Swap synthetic dyes for Dragon Fruit Powder or Beet Juice.
- Note: Beet juice can add an earthy undertone, so pair it with a strong flavor like chocolate or raspberry. Dragon fruit powder is flavor-neutral and creates a stunning magenta.
- Sugar Reduction: Replace 50% of the granulated sugar with Allulose or Erythritol. These sweeteners do not caramelize as quickly, which actually helps keep the cake pinker!
- Whole Grain Option: Use White Whole Wheat Flour. It is lighter than standard whole wheat but adds fiber. You may need an extra tablespoon of milk to account for absorption.
Serving Suggestions
To make your pink cake truly Instagram-worthy, consider these presentation concepts:
- The Monochromatic Look: Frost with a strawberry buttercream matched exactly to the cake crumb. Top with pink macarons and fresh raspberries.
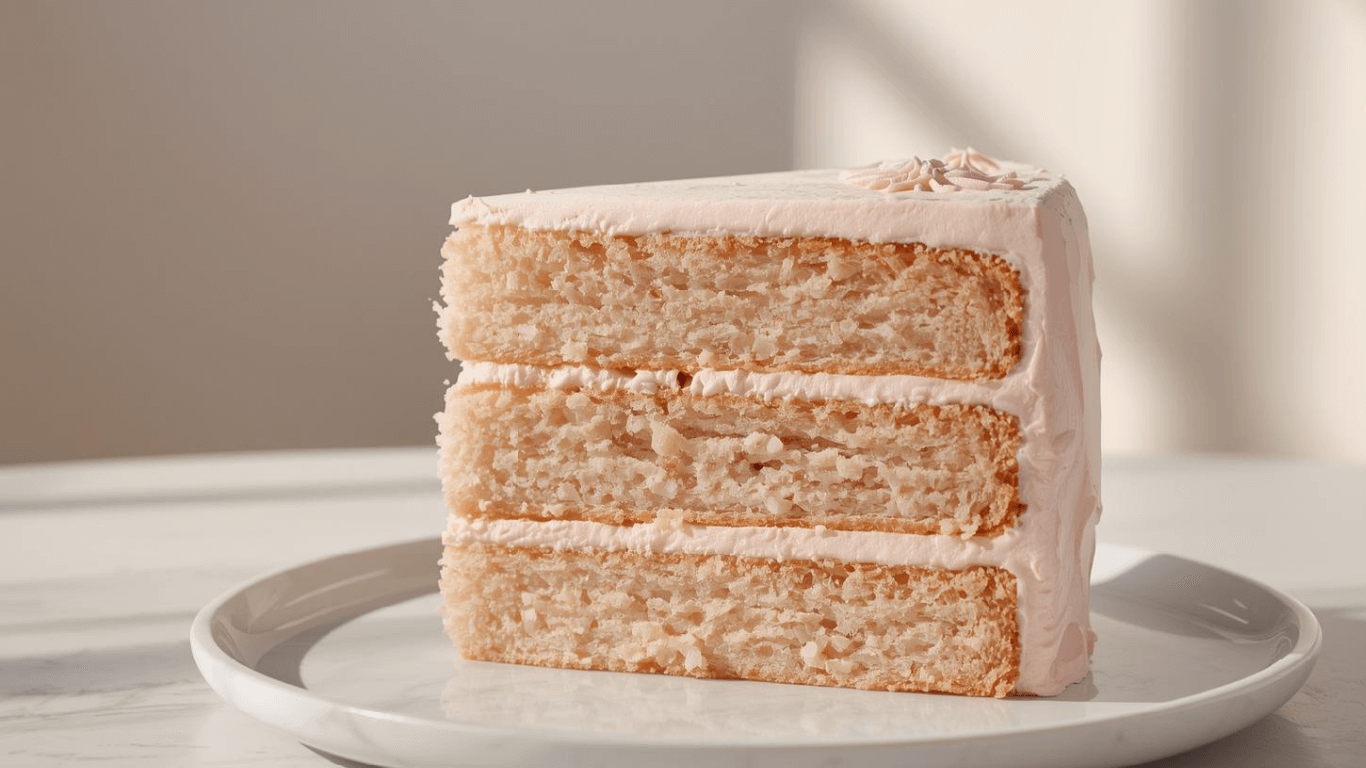
- The Ombre Effect: If making a 3-layer cake, dye the bottom layer dark pink, the middle layer medium pink, and the top layer light pink. When you slice into it, the gradient effect is visually stunning.
- Flavor Pairings: Pink layers pair exceptionally well with:
- Lemon Curd filling (Pink Lemonade theme).
- Champagne Buttercream (for adult birthdays).
- Dark Chocolate Ganache (for a Valentine’s contrast).
Common Mistakes to Avoid
Even experienced bakers can run into trouble with colored batters. Here is how to avoid the most common pitfalls:
- The “Salmon” Effect: This happens when you use yellow butter and egg yolks combined with pink dye. Fix: Always use egg whites only and consider using a high-ratio shortening or very pale butter if you need a true cool-toned pink.
- Browning Edges: The Maillard reaction (browning) is the enemy of colored cakes. Fix: Reduce oven temp by 25°F and bake slightly longer. Cover the top loosely with foil for the last 10 minutes if it starts to tan.
- Overmixing the Dye: Once you add the dye, do not beat on high speed. Overmixing develops gluten, making the cake tough. Fold the color in gently or mix on the lowest speed.
- Using Liquid Dyes: Standard grocery store liquid dyes contain a lot of water. To get a deep pink, you have to add so much liquid that you throw off the baking chemistry. Fix: Stick to gel pastes or powders.
Storing Tips for the Recipe
- Room Temperature: An unfrosted cake can be wrapped in plastic wrap and stored at room temperature for 2 days.
- Freezing (Best for Prep): Wrap cooled layers effectively in plastic wrap, then foil. Freeze for up to 3 months. Data Insight: Freezing cake layers actually locks in moisture, making the cake taste fresher when thawed than if it sat on the counter for 3 days.
- Leftovers: Once frosted, store in an airtight container. If you used cream cheese or fresh fruit filling, refrigerate. Otherwise, room temperature is best for preserving the texture of the butter base.
Conclusion
Mastering the art of the pink cake is about more than just dumping food coloring into a bowl; it is about controlling the chemistry of your ingredients to allow the color to shine. By eliminating yellow yolks, using clear vanilla, and baking at a lower temperature, you can achieve that professional, bakery-style hue right in your home kitchen.
Ready to bake the world a little brighter? We would love to see your shade! Snap a photo of your slice, tag us on social media, and leave a comment below telling us which coloring method you used. Don’t forget to subscribe to our newsletter for more color-theory baking guides!
FAQs
Q: Why did my pink cake turn brown on top?
A: This is due to caramelization of the sugar. To prevent this, lower your oven rack one notch and cover the cake loosely with aluminum foil halfway through the baking time.
Q: Can I use this recipe to make blue or purple cake?
A: Absolutely! Because this is a “White Velvet” base with no yellow yolks, it is the perfect canvas for blue or purple dyes, which usually turn green or gray in yellow-batter cakes.
Q: Does beet powder change the taste?
A: In small quantities (1-2 tbsp), the earthy flavor is masked by the vanilla and sugar. However, if you are sensitive to it, freeze-dried strawberry powder is a fruitier, safer alternative.
Q: How do I get a “Millennial Pink” or “Blush” tone?
A: For a dusty, vintage pink (Millennial Pink), add a tiny pin-prick amount of brown or ivory gel coloring to your pink batter. This mutes the neon brightness and creates a sophisticated pastel.
![How To Create The Perfect [Is It Cake Valentines] In 5 Steps](https://monetizegrid.com/wp-content/uploads/2026/02/Untitled-design-2026-02-02T091421.163-768x432.webp)