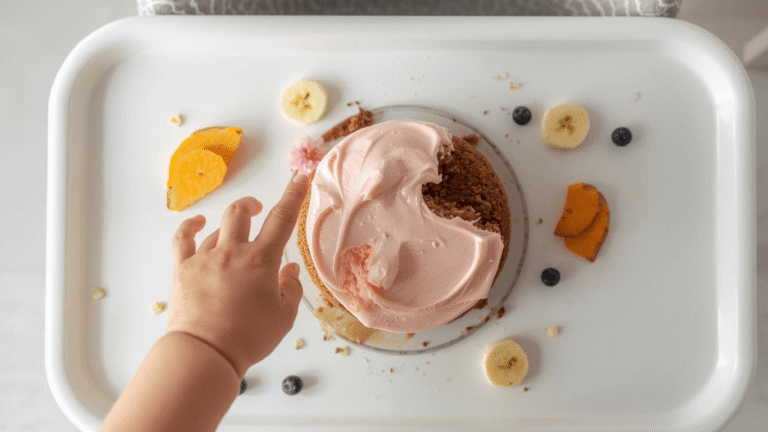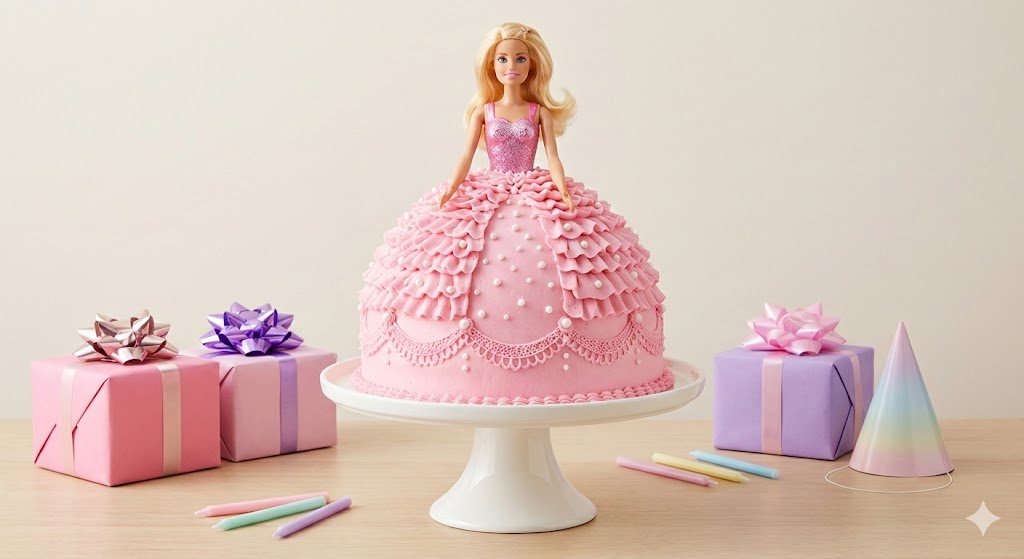
How To Bake A 3-Layer Barbie Cake From Scratch
Did you know that despite the endless trend cycles of social media, searches for “nostalgic birthday cakes” have surged by over 45% in the last year? In a world of fleeting digital trends, the classic Barbie Cake remains a timeless icon of childhood joy. But here is the challenge that stops most home bakers in their tracks: the belief that you need a professional engineering degree to make the skirt stand up.
We are here to dismantle that myth. Creating a stunning doll cake isn’t about complex structural equations; it’s about simple stacking and smart piping. Whether you are planning a birthday party for a princess-obsessed toddler or a retro-themed bash for a friend, this guide will walk you through the process. By the end of this post, you will master the art of the Barbie Cake, turning a simple sponge and buttercream into an architectural masterpiece that tastes as good as it looks.
Ingredients List
To build a Barbie Cake that is structurally sound and delicious, you need ingredients that offer stability. A light, airy chiffon might collapse under the weight of the doll; we need a robust, velvety crumb.
- The Cake Base (The Skirt Structure):
- 3 boxes of Vanilla Cake Mix (or your favorite sturdy pound cake recipe): We recommend pound cake for its density, which is crucial for carving.
- 1 cup Whole Milk: Adds fat for a moister crumb than water.
- 6 Large Eggs: Room temperature for better emulsification.
- 1 cup Unsalted Butter: Melted and cooled.
- The “Glue” and Decoration:
- 4 lbs American Buttercream: You need a frosting that crusts slightly. Swiss Meringue is delicious but can be too slippery for heavy piping work on vertical surfaces.
- Gel Food Coloring: Pink, purple, or your theme color. Tip: Gel creates vibrant colors without watering down the frosting consistency.
- Edible Glitter or Dragees: For that magical sparkle.
- The Centerpiece:
- 1 Barbie Doll: Undressed and sanitized. You can use a specific “cake doll pick” (which is just the torso on a spike), but a standard fashion doll allows for facial customization.
Timing
Don’t rush art. A Barbie Cake is a marathon, not a sprint.
- Preparation Time: 45 minutes
- Cooking Time: 50–60 minutes (depending on pan depth)
- Decorating Time: 90 minutes
- Total Time: Approx. 3 hours and 15 minutes.
Data Insight: While this takes roughly 40% longer than a standard sheet cake, the majority of that time is spent on decorating. If you break this into two days (bake day and decorate day), the active time feels much more manageable.
Step-by-Step Instructions
Step 1: Baking the Dome
The secret to the perfect skirt silhouette is the bake. If you have a specific dome-shaped cake pan (like a Wilton Wonder Mold), use it. However, you don’t need one!
- The Hack: Bake three round cakes of decreasing sizes (e.g., 8-inch, 7-inch, and 6-inch) and bake one layer in a heat-safe, stainless steel mixing bowl (greased heavily).
- The Action: Bake at 325°F (160°C). Low and slow prevents the outside from burning before the deep center is cooked. Test with a long skewer; it must come out clean.
Step 2: Preparing the Doll
While the cakes cool, prep your muse. Hygiene is paramount when embedding a toy into food.
- The Wrap: Wrap the doll’s lower body (from the waist down to the toes) tightly in plastic wrap (cling film). This keeps the doll clean and prevents hair/plastic from touching the edible cake.
- The Hair: Tie the doll’s hair up in a high bun. You don’t want loose strands getting caught in your buttercream while you pipe.
Step 3: Stacking and Carving
Now, we build the Barbie Cake architecture.
- Stacking: Level your round cakes. Stack them with a layer of frosting in between, placing the largest at the bottom and the bowl-baked dome on top.
- The Hole: Using a round biscuit cutter or a sharp knife, carve a vertical cylinder hole right down the center of the stack. It should be just wide enough to fit the doll’s legs.
- Carving: If you stacked round cakes, use a serrated knife to shave off the “steps,” creating a smooth slope from the top dome down to the bottom base.
Step 4: The Crumb Coat
This is the most critical step for a professional finish.
- The Seal: Apply a thin layer of white frosting over the entire cake skirt. This traps the crumbs so they don’t mar your final design.
- Insertion: Gently slide your plastic-wrapped doll into the center hole. Her waist should sit flush with the top of the cake. Use extra frosting to fill any gaps around her hips.
- Chill: Refrigerate the cake for 30 minutes until the crumb coat is firm to the touch.
Step 5: The Skirt Design (Piping)
This is where the magic happens. We will use a classic rosette technique, which looks intricate but is beginner-friendly.
- The Tool: Fit a piping bag with a 1M or 2D star tip.
- The Motion: Start at the bottom of the skirt. Pipe a spiral starting from the center and looping outward (counter-clockwise).
- The Pattern: Complete a row of rosettes around the base. Move up to the next layer, piping rosettes in the gaps of the previous row (brick-laying pattern). Continue until you reach the doll’s waist.
- The Bodice: Use a smaller round tip to pipe dots or stars directly onto the doll’s plastic torso to create a matching bodice.
Step 6: Finishing Touches
Personalize your Barbie Cake to make it unique.
- Accessories: Add edible pearls at the center of each rosette.
- The Sash: Pipe a ribbon around the waist to hide the seam between the plastic doll and the cake skirt.
- Sparkle: A light dusting of edible luster dust gives the skirt a fabric-like sheen.
Nutritional Information
While a Barbie Cake is a celebration treat, it is helpful to understand the nutritional breakdown. The following data is based on a standard slice (1/12th of the cake).
| Nutrient | Amount per Serving | % Daily Value* |
|---|---|---|
| Calories | 580 kcal | 29% |
| Total Fat | 28g | 36% |
| Saturated Fat | 12g | 60% |
| Carbohydrates | 82g | 30% |
| Sugars | 65g | – |
| Protein | 4g | 8% |
> Percent Daily Values are based on a 2,000 calorie diet.
Healthier Alternatives for the Recipe
If you want to reduce the sugar load or accommodate dietary restrictions without sacrificing the “wow” factor, try these swaps:
- The Flour Swap: Use a 50/50 mix of all-purpose flour and white whole wheat flour. This adds fiber without making the cake too dense.
- Sugar Reduction: In the cake batter, you can reduce the sugar by 20% without affecting the structure. Alternatively, substitute half the sugar with monk fruit sweetener.
- Natural Coloring: Instead of artificial dyes, use freeze-dried strawberry powder or beet powder to achieve a stunning pink hue for the Barbie Cake skirt.
- Frosting: Try a mascarpone whipped cream frosting instead of American buttercream. It uses significantly less sugar, though it must be kept refrigerated and piped immediately before serving.
Serving Suggestions
Presentation is everything.
- The Reveal: Place the cake on a rotating cake stand for the “grand reveal” moment. The 360-degree view emphasizes the skirt design.
- Slicing: Because the cake is tall, traditional wedges can be messy. Use the “cutting board method”: Slice the cake horizontally (taking the top half off), then cut slices from the flat surfaces.
- Pairings: Serve with a tart raspberry coulis to cut through the sweetness of the buttercream, or a glass of cold oat milk.
Common Mistakes to Avoid
Even seasoned bakers can stumble with structural cakes. Here are the data-driven pitfalls:
- The “Leaning Tower”: The Mistake: Using a soft sponge cake (like angel food) or filling layers with slippery filling (like lemon curd). The Fix: Stick to dense cakes and buttercream dams.
- The Melting Skirt: The Mistake: Decorating in a hot kitchen. Buttercream melts at roughly 90°F (32°C). The Fix: If your hand warms the piping bag, switch bags frequently or pop them in the fridge for 5 minutes.
- The “Dry” Dome: The Mistake: Overbaking the bowl layer. The Fix: The center of a bowl takes longer to cook than the edges. Use heating cores (or a flower nail) in the center of the batter to distribute heat evenly.
Storing Tips for the Recipe
- Short Term: This cake can stay at cool room temperature for up to 2 days (unless you used whipped cream frosting). Cover the cut section with plastic wrap.
- Fridge: You can refrigerate the fully decorated cake. The butter in the frosting will harden, locking in moisture. Remove it from the fridge 2 hours before the party so the frosting softens for eating.
- Make-Ahead: You can bake the cake layers up to 2 weeks in advance. Wrap them in plastic wrap and foil, then freeze. Decorate the frozen layers—it’s actually easier to crumb coat a frozen cake!
Conclusion
Creating a Barbie Cake is more than just baking; it is about crafting a memory. By following these 6 simple steps—baking the dome, prepping the doll, stacking, crumb coating, piping the rosette skirt, and adding the final touches—you can achieve a bakery-quality result at home. Don’t let gravity scare you; with the right ingredients and patience, your doll design will stand tall and taste incredible.
Ready to become the hero of the party? Try this recipe this weekend!
We would love to see your creations. Snap a photo of your skirt design and share it in the comments below, or subscribe to our newsletter for more structural cake tutorials delivered straight to your inbox.
FAQs
Q: Can I use a regular Barbie doll, or will it melt in the cake?
A: You can absolutely use a regular plastic fashion doll. The cake is already cooled when you insert the doll, so there is no risk of melting. Just ensure you wash the doll and wrap the legs in plastic wrap.
Q: How do I transport a tall Barbie Cake?
A: Transport is tricky! We recommend using a tall cake box (you can buy boxes specifically for “tall tier” cakes) or leaving the lid of a standard box open and covering the top loosely with foil. Place the box on the floor of the car (the flattest surface), not the seat.
Q: Do I really need a crumb coat?
A: Yes! It is non-negotiable for a professional look. Without it, little bits of brown cake will mix into your pink frosting, ruining the clean look of the rosettes.
Q: My frosting is too soft to hold the rosette shape. What do I do?
A: Your kitchen might be too warm, or you may have added too much milk. Add a few tablespoons of sifted powdered sugar to stiffen it up, or refrigerate the piping bag for 10 minutes before trying again.