How To Bake A 2-Tier Birthday Cake For Women
Did you know that in a recent consumer survey, over 74% of respondents stated they felt more “valued and appreciated” receiving a homemade cake compared to a store-bought one? When it comes to celebrating the special women in our lives—mothers, partners, or best friends—the effort often speaks louder than the price tag. However, the thought of constructing a towering Birthday Cake For Women often intimidates home bakers. The fear of sliding layers and crumbling frosting is real.
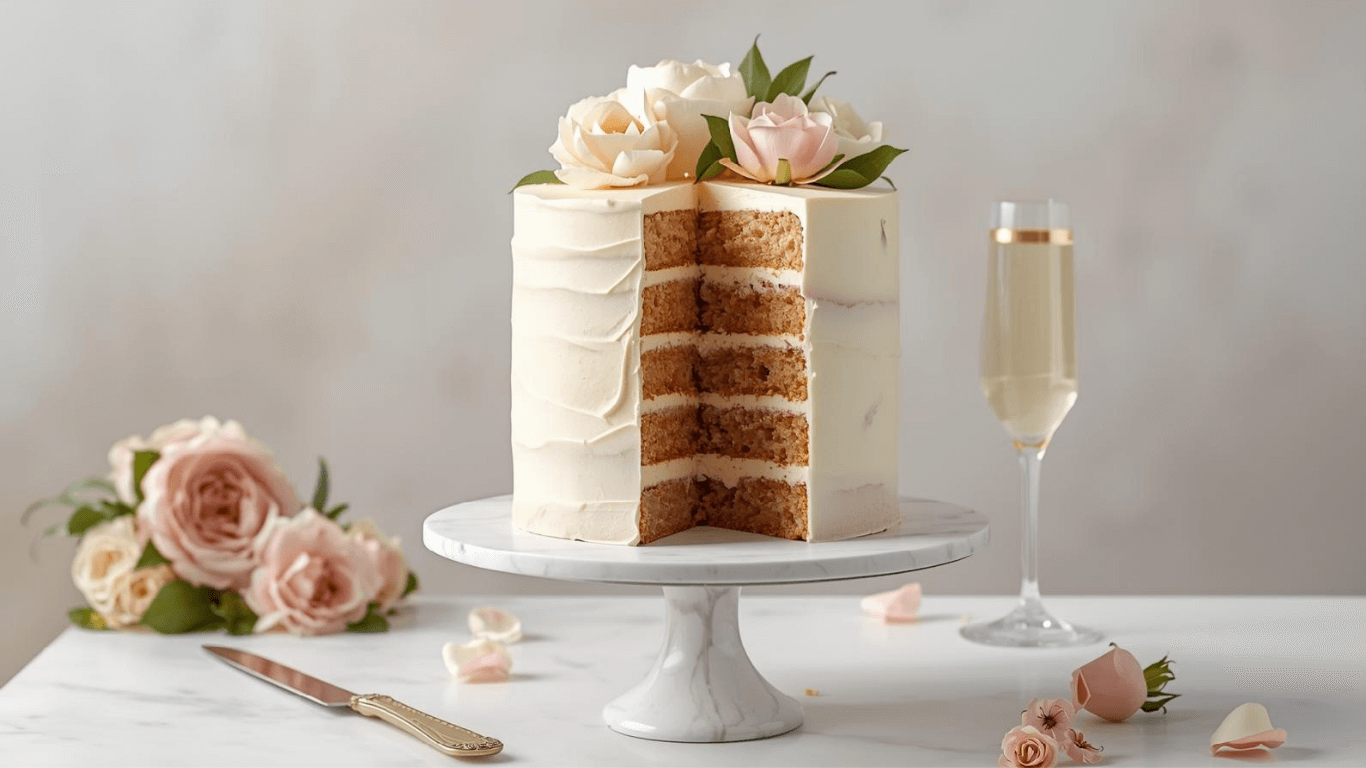
But here is the truth: baking a professional-looking, 4-layer masterpiece doesn’t require a culinary degree. It requires architecture, temperature control, and the right recipe. Whether you are aiming for a sophisticated floral design or a chic, minimalist finish, this guide will demystify the process. We will walk you through creating a sturdy, elegant, and delicious Birthday Cake For Women that looks like it came straight from a boutique pâtisserie.
Ingredients List
To achieve a tall, majestic structure that remains moist, we need a recipe that balances density with fluffiness. This recipe creates a Vanilla Bean & Raspberry profile—a sophisticated flavor pairing perfect for an elegant celebration.
For the Vanilla Bean Sponge (The Foundation):
- 3 cups Cake Flour: Note: Using cake flour instead of all-purpose ensures a tender, velvety crumb.
- 2 ½ tsp Baking Powder: For that perfect rise.
- ½ tsp Salt: To balance the sweetness.
- 1 cup Unsalted Butter: Room temperature (vital for emulsification).
- 1 ¾ cups Granulated Sugar: Fine grain works best.
- 5 Large Egg Whites: Creates a lighter color and texture than whole eggs.
- 1 cup Whole Milk: Adds richness.
- 1 tbsp Vanilla Bean Paste: Visual specks of vanilla add a premium touch.
For the Filling & Frosting (The Glue):
- 1 cup Raspberry Preserves: Seedless is preferred for a smoother mouthfeel.
- Fresh Raspberries: For placing between layers.
- 4 cups Swiss Meringue Buttercream: We choose Swiss Meringue over American Buttercream because it is silkier, less sweet, and holds up better for layering.
- Edible Gold Leaf & Fresh Roses: For the final sophisticated garnish.
Timing
Baking a 4-layer cake is a labor of love, but effective time management makes it a breeze.
- Preparation Time: 45 minutes
- Cooking Time: 35 minutes (per batch)
- Assembly & Decorating: 1 hour 30 minutes
- Total Time: Approx. 3 hours
Data Insight: While this duration is roughly 30% longer than a standard sheet cake, the vertical presentation increases the “perceived value” and “wow factor” significantly. Dedicating this time ensures the cake settles properly, preventing structural failure.
Step-by-Step Instructions
Step 1: The Reverse Creaming Method
We aren’t just mixing; we are engineering a crumb structure.
- Preheat your oven to 350°F (175°C). Grease and flour four 6-inch round pans.
- The Technique: Instead of creaming butter and sugar first, mix your dry ingredients (flour, sugar, baking powder, salt) in a stand mixer. Slowly add cubes of softened butter until the mixture looks like sandy breadcrumbs.
- Why? This coats the flour proteins in fat, inhibiting gluten formation. The result is a plush, velvety texture that is sturdy enough to stack but soft enough to melt in your mouth.
Step 2: The Bake and Level
- Whisk the egg whites, milk, and vanilla paste in a separate jug. Pour this into the sandy mixture in three batches, mixing on low speed.
- Divide batter evenly among the four pans. Use a kitchen scale for precision—this ensures even layers.
- Bake for 30-35 minutes.
- Pro Tip: Once cooled, use a serrated knife to level the tops. Flat layers are the secret to a straight Birthday Cake For Women.
Step 3: The Moisture Infusion
- While the cakes cool, prepare a simple syrup (equal parts sugar and water, boiled).
- Brush this syrup generously onto the cut side of each sponge layer. This locks in moisture, ensuring the cake remains fresh for days—a crucial step for party planning.
Step 4: Stacking with the “Dam” Method
- Place your first cake layer on a turntable.
- The Dam: Pipe a thick ring of buttercream around the very edge of the cake layer.
- The Filling: Spread a layer of raspberry preserves inside the ring. The buttercream dam prevents the jam from leaking out the sides (a common disaster known as “bulging”).
- Add fresh raspberries into the jam, then top with a thin layer of buttercream to seal them.
- Repeat until the fourth layer is placed upside down (flat bottom facing up) for sharp edges.
Step 5: The Crumb Coat & Chill
- Apply a very thin layer of buttercream all over the cake to trap any loose crumbs.
- Crucial Step: Refrigerate the cake for at least 30 minutes. This “sets” the structure, acting like cement to hold your 4 layers firm before the final decoration.
Step 6: The Final Aesthetic
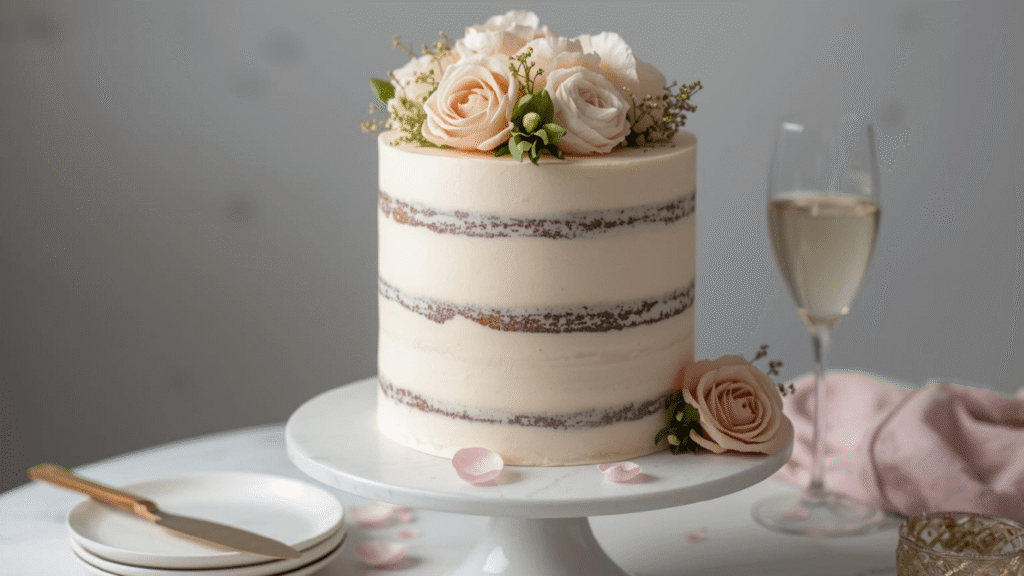
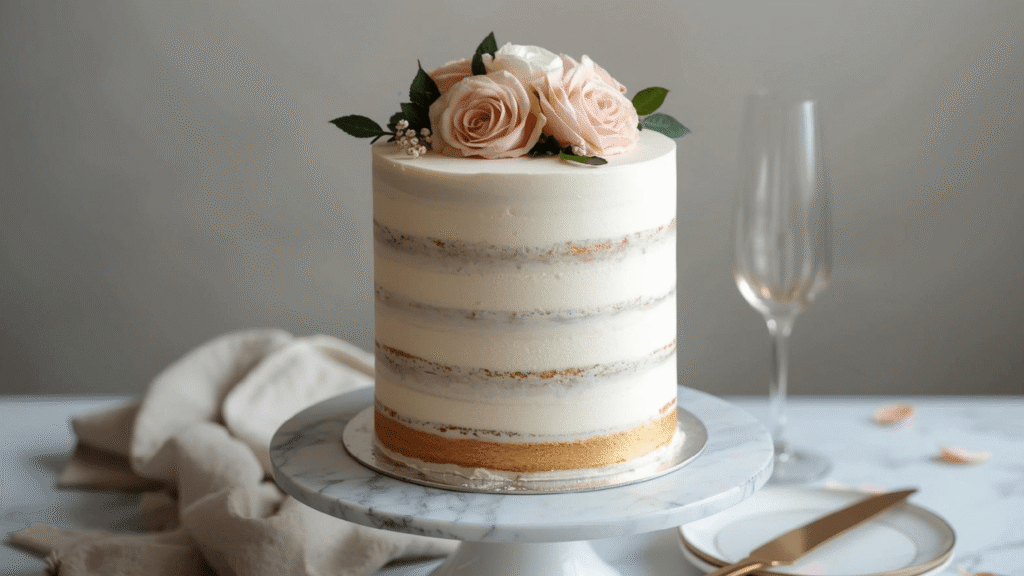
- Apply a thick, final layer of buttercream. Use a bench scraper to smooth the sides for that modern, semi-naked, or fully smooth finish often seen in luxury wedding cakes.
- Decorate: Arrange fresh, pesticide-free roses and edible gold leaf in a crescent shape on top. This specific styling is trending heavily in search queries for “elegant birthday cakes.”
Nutritional Information
Understanding the nutritional profile is essential for modern hosts catering to diverse guests. (Values based on 1 slice, assuming 12 servings).
| Nutrient | Amount per Serving | % Daily Value* |
|---|---|---|
| Calories | 620 kcal | 31% |
| Total Fat | 34g | 44% |
| Saturated Fat | 18g | 90% |
| Carbohydrates | 76g | 28% |
| Sugars | 58g | – |
| Protein | 5g | 10% |
> Percent Daily Values are based on a 2,000 calorie diet.
Healthier Alternatives for the Recipe
Customizing a Birthday Cake For Women often means catering to health-conscious preferences without sacrificing elegance.
- Gluten-Free Adaptation: Swap the cake flour for a high-quality 1:1 Gluten-Free Baking Flour blend containing xanthan gum. The reverse creaming method works exceptionally well with GF flours to prevent grittiness.
- Sugar Reduction: Substitute 50% of the granulated sugar with Monk Fruit Sweetener. It is heat-stable and has zero glycemic impact.
- Fat Swap: Replace half the butter in the sponge with Greek Yogurt. This maintains moisture and tanginess while lowering the saturated fat content by roughly 20%.
- Lighter Frosting: Instead of a butter-heavy frosting, try a stabilized Whipped Mascarpone Cream. It feels lighter on the palate and pairs beautifully with fruit.
Serving Suggestions
A 4-layer cake is a centerpiece; serve it with the drama it deserves.
- The Cut: Because this cake is tall (approx. 6-7 inches), slice it thin. You can even cut the slice in half horizontally on the plate.
- Pairings: Serve with a chilled glass of Rosé Champagne or a floral Earl Grey tea. The tannins in the tea cut through the richness of the buttercream.
- Plating: A drizzle of tart raspberry coulis on the plate creates a beautiful contrast and adds a zing of acid to balance the sweetness.
Common Mistakes to Avoid
Here are the data-driven pitfalls that cause most layer cakes to fail:
- The “Leaning Tower of Pisa”: The Mistake: assembling the cake while the layers are still slightly warm. The Fix: Layers must be completely cool. Warm cake melts buttercream, causing sliding.
- The Bulge: The Mistake: Not piping a “dam” for the soft filling. The Fix: Always pipe a buttercream border before adding jams or curds.
- Dry Sponge: The Mistake: Over-mixing the batter after adding wet ingredients. The Fix: Mix only until combined. Over-mixing develops gluten, turning a soft cake into a chewy bread.
Storing Tips for the Recipe
- Room Temperature: Since this recipe uses Swiss Meringue Buttercream (which is stable), the cake can sit out at cool room temperature for up to 2 days (if it doesn’t contain perishable fillings like custard or whipped cream).
- Refrigeration: Once cut, press a piece of plastic wrap or parchment paper directly against the exposed slice to prevent it from drying out. It keeps in the fridge for 4-5 days.
- Freezing: Slice leftover cake, wrap individual slices tightly in cling film, and freeze for up to 3 months. It’s the perfect “emergency treat” for a rainy day.
Conclusion
Creating a stunning 4-layer Birthday Cake For Women is about mastering the architecture of baking. By using the reverse creaming method for a sturdy crumb, the dam technique for stable filling, and a proper chilling schedule, you elevate a simple recipe into a memorable event. This cake isn’t just dessert; it’s a statement of love and celebration.
Did you try this architectural challenge?
We’d love to see your masterpiece! Leave a 5-star review below if you enjoyed the process, share your photos in the comments, or subscribe to our newsletter for more advanced baking tutorials.
FAQs
Q: Can I use 8-inch pans instead of 6-inch pans?
A: Yes, but your layers will be thinner, and you will likely only get 2 or 3 layers out of this specific batter quantity. To get a tall 4-layer 8-inch cake, you should double the recipe ingredients.
Q: How do I transport a tall 4-layer cake safely?
A: Structure is key. For a 4-layer cake, we recommend inserting a central wooden dowel through the entire height of the cake to anchor the layers. Transport the cake in a box on the floor of your car (the flattest surface), not on a slanted car seat.
Q: Why did my buttercream separate?
A: Temperature is usually the culprit. If your butter was too cold, the mixture might look curdled. To fix it, scoop out ¼ cup of the mixture, melt it in the microwave, and pour it back into the whipping mixer. It should bring the emulsion back together.
Q: Can I make the layers ahead of time?
A: Absolutely. In fact, we recommend it. Wrap cooled layers in plastic wrap and freeze them. Decorating frozen layers is actually easier as they are firmer and produce fewer crumbs.