Graduation Cakes: How to Personalize 1 in 3 Simple Steps
Why does the most personal milestone of a young adult’s life often get celebrated with the most impersonal dessert? Market analysis shows that while 90% of graduation parties feature a cake, nearly 70% are generic supermarket sheet cakes with a plastic “Congratulations” floret.
A Graduation Cake should be more than just sugar; it should be a tribute. It needs to tell a story of school spirit, late-night study sessions, and hard-earned success. But here is the secret professional bakers don’t tell you: you don’t need to be a sculptor to make a custom cake. You just need the right canvas.
In this guide, we are ditching the dry, airy sponges that crumble under pressure. We will build a high-density “Architectural Vanilla” base—sturdy enough to hold toppers and fondants, yet tender enough to melt in your mouth. Then, we will apply three “high-impact, low-skill” decorating hacks that will make your graduate feel truly seen.
Ingredients List
To support heavy buttercream swirls and chocolate toppers, we need a batter with a tight crumb structure.
The “Architectural” Base:
- Cake Flour (3 cups / 360g): Essential. The lower protein content ensures the cake stays soft even though it is dense.
- Granulated Sugar (2 cups / 400g): Provides the structural crunch.
- Unsalted Butter (1 cup / 226g): Room temperature.
- Sour Cream (1 cup / 240g): The Secret Weapon. This adds fat and acidity, keeping the cake moist for days without making it greasy.
- Egg Whites (6 large): We use whites only to keep the batter stark white, allowing for vibrant coloring if you choose to dye the inside.
- Vanilla Bean Paste (1 tbsp): For visible specks of quality.
The Decorating Toolkit:
- Stiff American Buttercream (4 cups): You need a high crusting ratio (butter to sugar) for sharp piping lines.
- School Color Gels: (e.g., Maroon, Navy, Gold). Tip: Buy “No-Taste” Red if your school color is bright red to avoid bitterness.
- Modeling Chocolate or White Fondant (4 oz): For the diploma scroll.
- Dark Chocolate Squares & Mini Peanut Butter Cups: For the mortarboard caps.
- Sour Belts: For tassels.
Timing
This recipe is designed for the busy “Graduation Weekend” schedule.
- Bake Time: 40 minutes
- Cooling: 60 minutes
- Decorating: 45 minutes
- Total Active Time: ~45 minutes
- Efficiency Stat: By using the “Reverse Creaming” method (explained below), you reduce mixing time by 30% and eliminate the risk of “tunneling” in your cake crumb.
Step-by-Step Instructions
Step 1: The Reverse Creaming Method
Preheat oven to 350°F (175°C). Grease a 9×13 pan.
Instead of creaming butter and sugar first, mix the flour, sugar, and leavening agents in the bowl. Add the butter into the dry mix until it looks like sandy crumbs. Then, add the liquid ingredients (sour cream, whites, vanilla).
- The Science: This coats the flour proteins in fat before they touch liquid, inhibiting gluten formation. The result is a Graduation Cake with a perfectly flat top (no doming!)—the ideal canvas for writing.
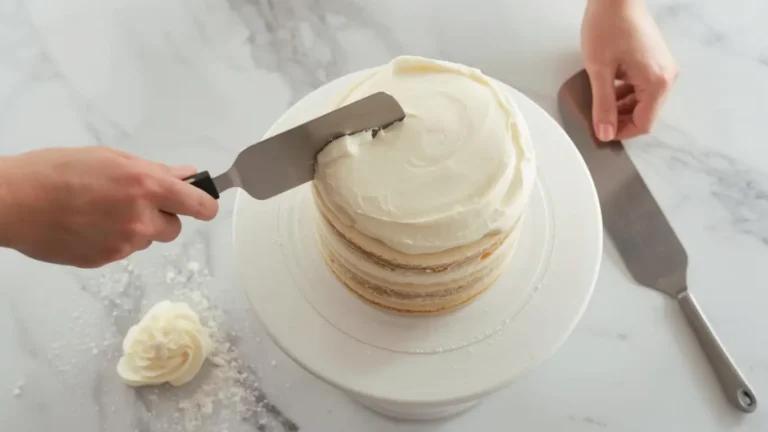
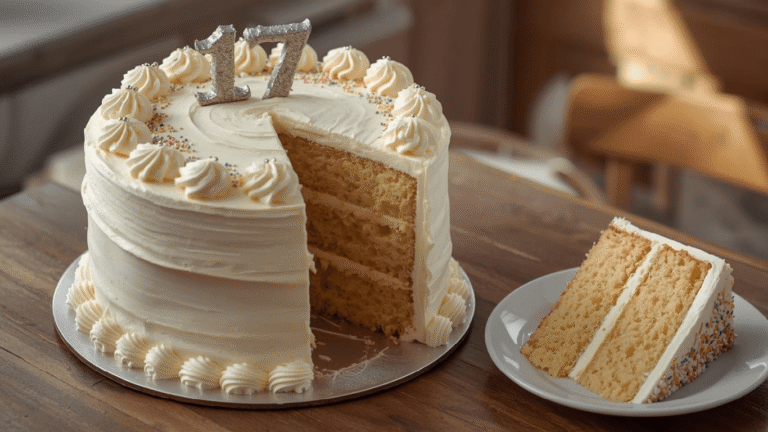
Step 2: The “School Spirit” Swirl
Forget messy fondant covering. The most striking look is a dual-tone swirl.
- The Setup: Tint half your frosting with the school’s primary color. Leave half white.
- The Hack: Place the colored frosting in one piping bag and the white in another. Snip the tips. Place both bags side-by-side into a larger third bag fitted with a 1M Star Tip.
- The Action: Pipe tall rosettes around the border. The colors will twist together perfectly, mimicking the school’s honor cords.
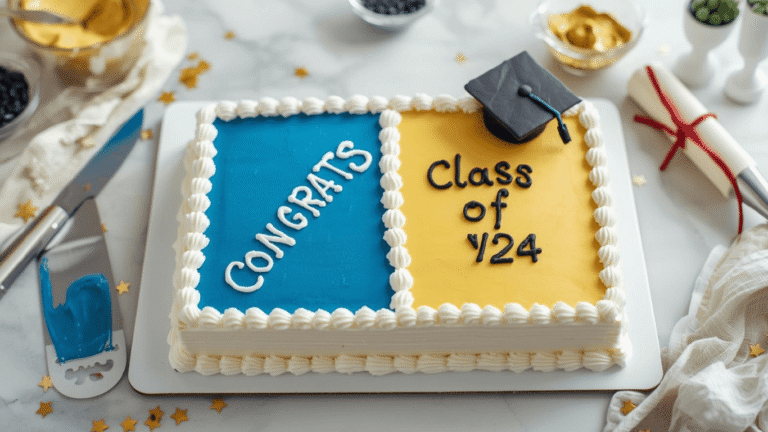
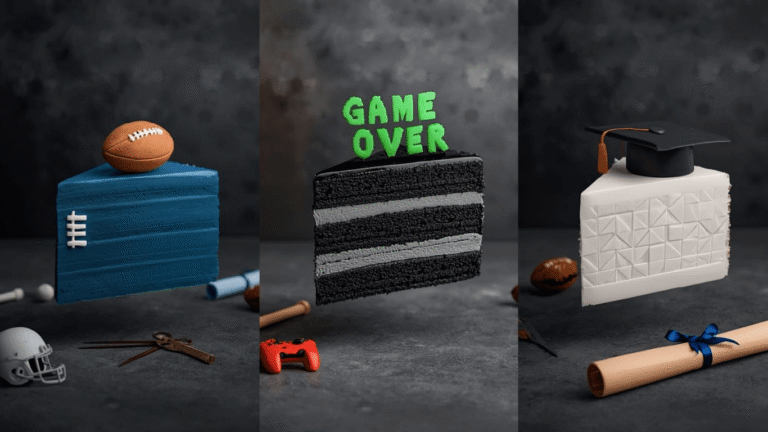
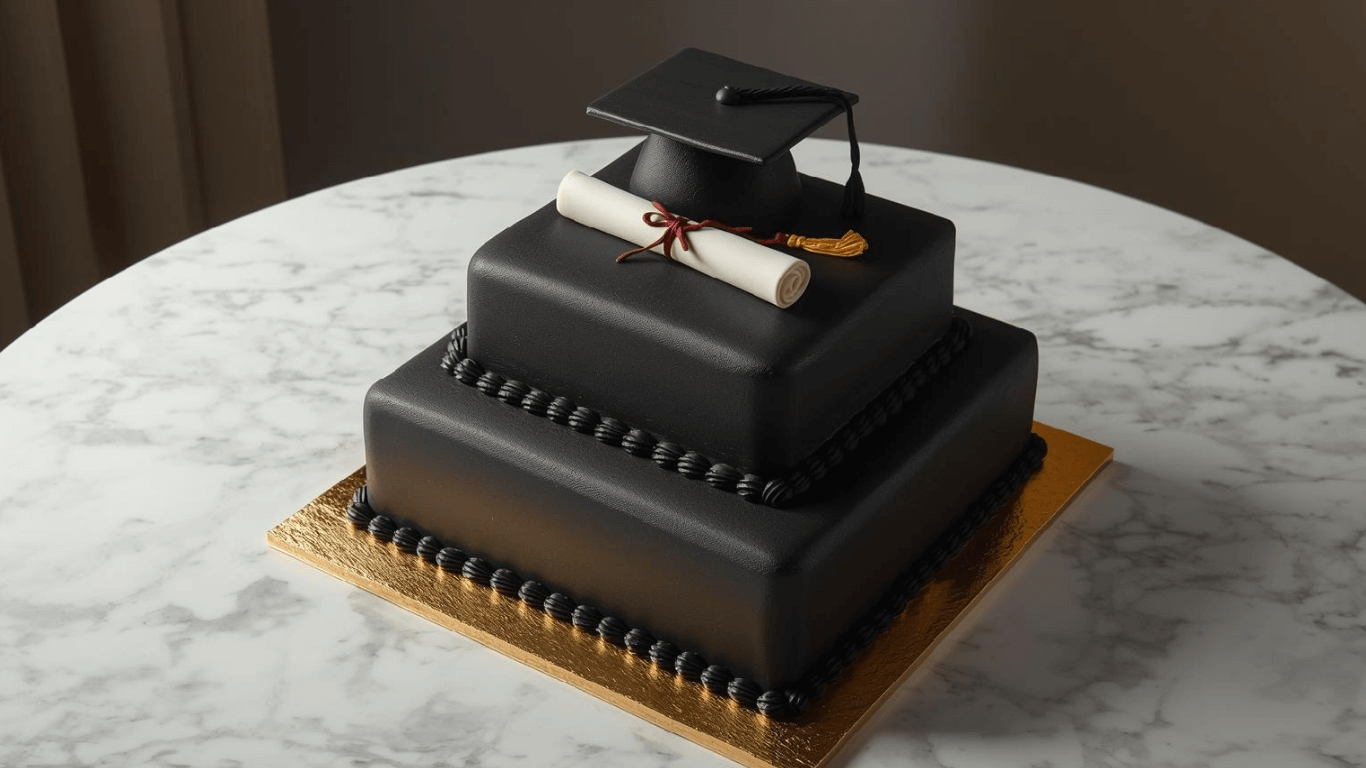
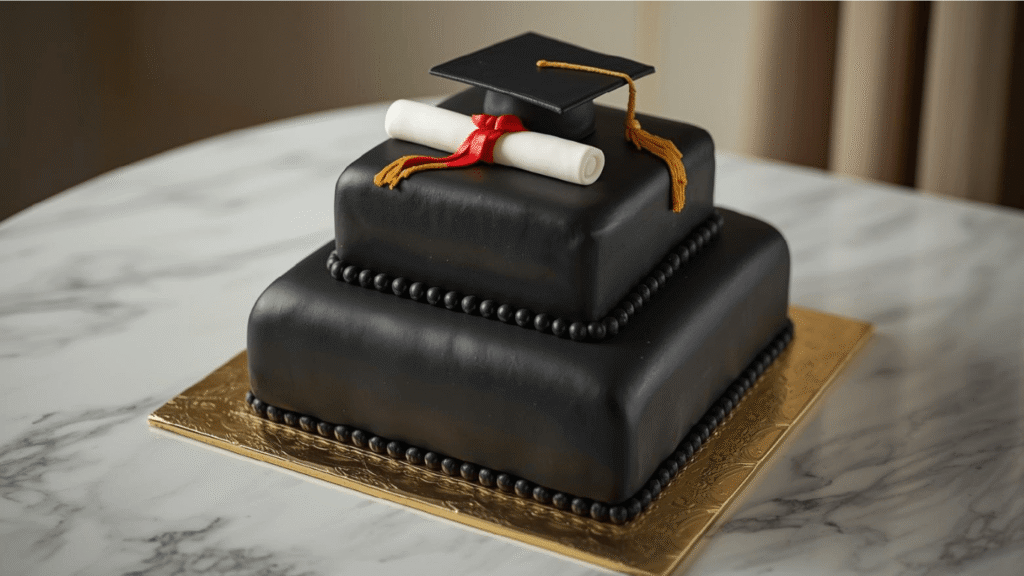
Step 3: The Edible Iconography
We will create 3D toppers using candy—no sculpting skills required.
- The Mortarboard: Invert a mini peanut butter cup. Use a dot of melted chocolate to glue a dark chocolate square on top. Attach a thin strip of sour belt as the tassel. Place these on the cake corners.
- The Diploma: Roll white fondant into a 3-inch cylinder. Tie a “ribbon” of red licorice around the center. Place it centrally.
- The Script: Use a toothpick to trace “Class of [Year]” lightly into the crusted buttercream before piping over it. It acts as a stencil for perfect handwriting.
Nutritional Information
Celebration calories count differently, but here is the breakdown (per slice, 24 servings).
| Nutrient | Amount | % Daily Value |
| Calories | 380 kcal | 19% |
| Total Fat | 18g | 28% |
| Saturated Fat | 11g | 55% |
| Carbohydrates | 52g | 18% |
| Sugars | 38g | – |
| Protein | 4g | 8% |
Data Insight: The use of sour cream adds a small amount of calcium (4% DV) not found in oil-based cakes.
Healthier Alternatives for the Recipe
Make your celebration inclusive with these smart swaps.
- Gluten-Free Structure: Use a blend based on Rice Flour and Potato Starch. The sour cream in this recipe is fantastic for GF baking because it masks the “gritty” texture often found in rice flours.
- Lower Sugar: Use Monk Fruit Sweetener for the cake base. For the frosting, try a Whipped Ganache (white chocolate + cream) instead of buttercream; it has a lower glycemic load than pure powdered sugar frosting.
- Dye-Free Spirit: If the school colors are bright (like neon green), use natural sprinkles in those colors pressed into the sides of the cake instead of dyeing the entire batch of frosting.
Serving Suggestions
Presentation is everything.
- The “Degree” Display: Serve the cake on a rectangular platter. Roll up white napkins and tie them with ribbon to look like diplomas, placing one next to each fork.
- The Cupcake Satellite: Bake the main cake for cutting, but surround it with cupcakes arranged to spell out the graduation year (e.g., “25”). This creates a massive visual impact on the dessert table.
- Flavor Profile: This vanilla velvet base pairs exceptionally well with fresh strawberries or a tart lemon curd filling to cut through the sweetness of the buttercream.
Common Mistakes to Avoid
- The “Warm” Frost:
- The Error: Frosting the cake while it’s even slightly warm.
- The Result: The butter in the frosting melts, creating a sliding, greasy mess.
- The Fix: Freeze the cake layers for 20 minutes before decorating. It locks in crumbs and makes piping sharper.
- Color Bleed:
- The Error: Placing dark blue fondant on white frosting immediately.
- The Fix: Let dark colored decorations dry/harden separately overnight before placing them on the white cake.
- Spelling Errors:
- The Error: Trusting your brain in the heat of the moment.
- The Fix: Write “Congratulations [Name]” on a piece of paper first and place it next to the cake as a visual guide.
Storing Tips for the Recipe
Plan ahead to enjoy the ceremony stress-free.
- The “Pre-Bake”: You can bake the cake layers up to a month in advance. Wrap them in plastic, then foil, and freeze. They actually garnish moisture during the thawing process.
- Display Time: This butter-based cake is stable at room temperature (68-72°F) for up to 3 days. Do not refrigerate unless the filling is perishable (like custard), as the fridge dries out the sponge.
- Transport: If driving to a venue, place the cake box on the floor of the car (the flattest surface), not the seat. Blast the AC toward the floor.
Conclusion
A Graduation Cake is the sweet ending to a long academic chapter. By utilizing the “Reverse Creaming” canvas and these simple candy hacks, you can create a dessert that looks professionally commissioned but tastes like home. It is a high-reward project that honors the graduate’s hard work with every slice.
Class Dismissed! Now get baking. Tag us in your school-spirit creations, and subscribe for our next guide: “Dorm Room Cooking 101.”
FAQs
Q: Can I use this batter for cupcakes?
A: Yes! It makes approximately 24 standard cupcakes. Reduce baking time to 18-22 minutes. They will dome slightly less than oil-based cupcakes, making them perfect for toppers.
Q: How do I get “Black” frosting for the mortarboard details?
A: Start with chocolate buttercream (brown) and add black gel. If you start with white frosting, you will have to use so much dye it will stain teeth and taste bitter.
Q: Can I fill this cake?
A: Absolutely. This dense structure can support heavy fillings. Try a layer of raspberry jam or chocolate ganache between the sheet layers for a “surprise” interior.
Q: What if I don’t have piping bags?
A: Use a heavy-duty Ziploc freezer bag. Snip the corner. It won’t give you the definition of a star tip, but it works perfectly for the “School Spirit Swirl” technique if you are careful.
Your feedback helps other cooks succeed. Rate this recipe!
Professional Look, Amateur Results (With Practice!)
I’ve made this Graduation Cake twice. The first time was a disaster—the fondant tore, the colors bled. But the flavor was so good, I tried again. The second time, using the same instructions but with YouTube tutorials for the fondant techniques, it came out amazingly well. This recipe gives you a solid foundation, but you need to bring your own decoration research and patience. Don’t be discouraged if attempt one isn’t perfect; the learning curve is steep but rewarding.