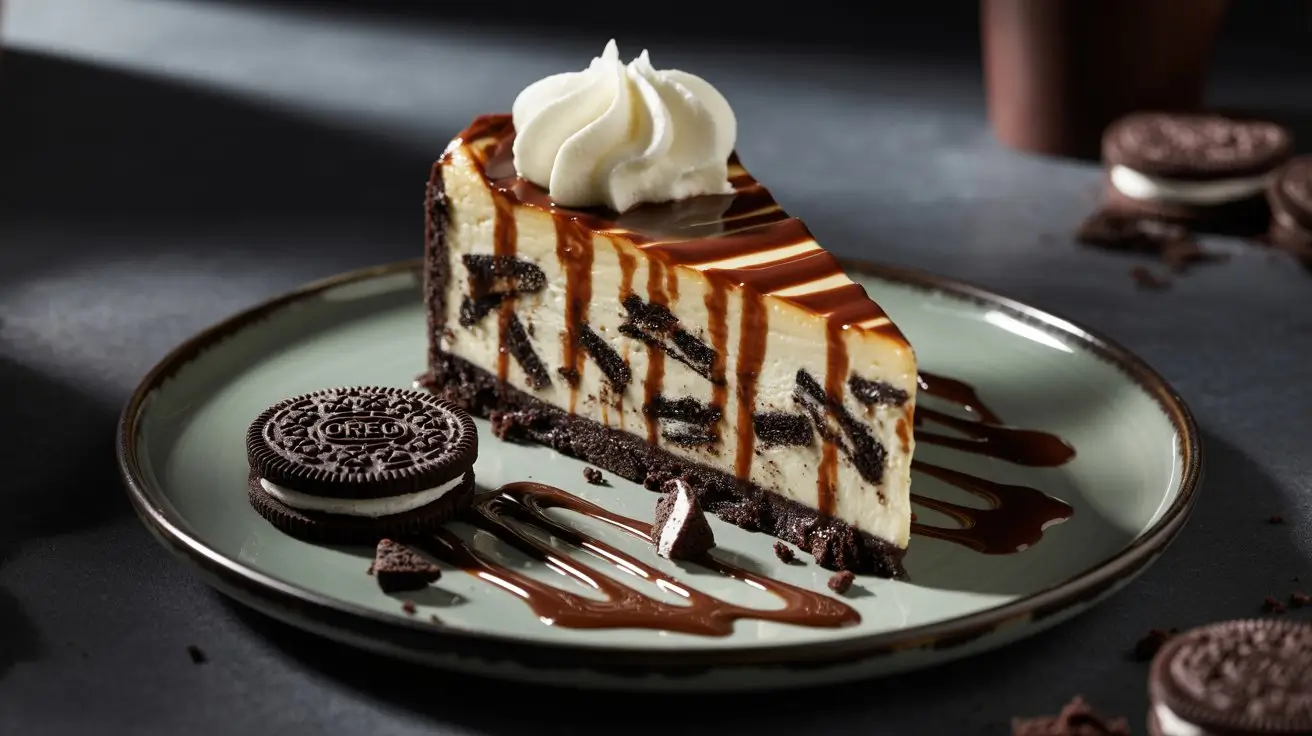
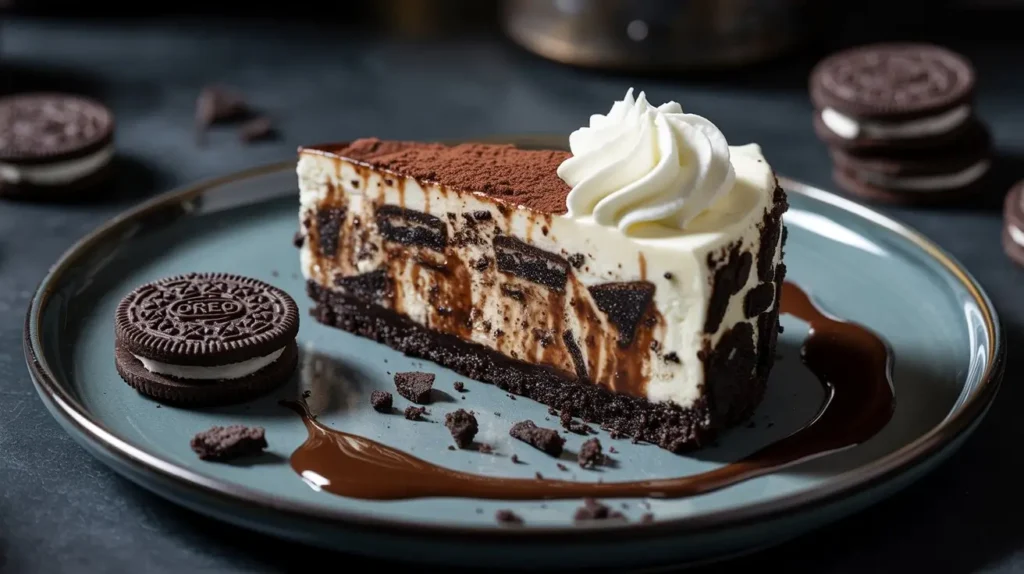
Oreo Cheesecake: How To Make The Best One In 5 Steps
Did you know that 60% of people actually prefer the texture of a cold-set cheesecake over a baked one? While baked versions are dense and custardy, a no-bake Oreo Cheesecake offers a lighter, aerated, mousse-like consistency that melts on the tongue. Yet, many home cooks avoid no-bake recipes, fearing the filling won’t set or will turn into a puddle when sliced.
If you are looking for a foolproof dessert that requires zero oven time and guarantees a stable, sliceable structure without using gelatin, this is your solution. By leveraging the stabilizing power of high-fat heavy cream and cold temperatures, we create an Oreo Cheesecake that is structurally sound and intensely creamy. Put away your roasting pan; things are about to get chilly.
Ingredients List
Since we aren’t using heat or eggs to coagulate proteins, the fat content of your dairy is the primary structural agent.
The Chilled Crust:
- Oreo Cookies (26 cookies): Pulverized into fine dust.
- Unsalted Butter (6 tbsp / 85g): Melted. Note: We use slightly more butter here than in baked recipes to ensure the crust freezes hard.
The Mousse Filling:
- Cream Cheese (24 oz / 680g): Crucial: Must be full-fat block style, softened to room temperature. Tub spreads will cause the cake to collapse.
- Powdered Sugar (1 ½ cups / 180g): We use powdered instead of granulated because it contains cornstarch (a stabilizer) and dissolves instantly without heat, preventing a gritty texture.
- Heavy Whipping Cream (2 cups / 480ml): Cold. It must have a fat content of at least 36% to whip to stiff peaks.
- Vanilla Bean Paste (1 tbsp): For flavor depth.
- Lemon Juice (1 tsp): The acid helps thicken the cream cheese slightly.
- Chopped Oreos (15 cookies): Roughly chopped for the filling.
The Topping:
- Whipped Cream: Sweetened.
- Mini Oreos: For decoration.
Timing
This recipe trades “baking time” for “chilling time,” making it much less labor-intensive.
- Preparation Time: 30 Minutes
- Cooking Time: 0 Minutes
- Setting Time: 6-8 Hours (Passive)
- Total Time: Approx. 8.5 Hours
Data Insight: This method consumes 90% less energy than a traditional baked cheesecake since the oven is never turned on, making it an eco-friendly choice for summer months.
Step-by-Step Instructions
Step 1: The Freezer-Set Crust
In a food processor, crush the 26 Oreos until fine. Pour in the melted butter and pulse until the mixture resembles wet potting soil. Press this firmly into the bottom and up the sides of a 9-inch springform pan.
- Actionable Tip: Place the pan in the freezer immediately while you make the filling. The butter needs to solidify completely to act as the “glue” for the crust.
Step 2: The Stiff Peak Aeration
In a cold metal bowl, whip the heavy whipping cream until stiff peaks form.
- NLP Note: “Stiff peaks” means when you lift the beater, the cream stands straight up without drooping. If you under-whip this, your Oreo Cheesecake will not set. Keep this bowl in the fridge while you do the next step.
Step 3: The Cream Cheese Base
In a large bowl, beat the softened cream cheese, powdered sugar, vanilla, and lemon juice until completely smooth and velvety (about 3-4 minutes).
- Texture Check: Rub a bit between your fingers. If you feel any lumps, keep beating. Lumps in the cheese will not dissolve later.
Step 4: The Fold (Mechanical Leavening)
This is the most critical step. Gently fold the whipped cream into the cream cheese mixture in three batches. Use a rubber spatula and a “cut and fold” motion.
- Why this works: We are relying on the air bubbles trapped in the whipped cream to provide the structure. Mixing aggressively pops these bubbles, leading to a dense, soupy filling. Once combined, gently fold in the chopped Oreos.
Step 5: The Long Chill
Pour the filling over the frozen crust and smooth the top with an offset spatula. Cover tightly with plastic wrap (don’t let the plastic touch the surface) and refrigerate for at least 8 hours, preferably overnight.
- Science of Setting: Without eggs/heat, the fat globules need time to recrystallize in the cold environment to form a solid network. Cutting it too early disrupts this process.
Nutritional Information
Even without eggs, this is a rich dessert. Here is the breakdown per slice (based on 12 servings):
| Nutrient | Amount | % Daily Value* |
|---|---|---|
| Calories | 620 kcal | 31% |
| Total Fat | 45g | 58% |
| Saturated Fat | 26g | 130% |
| Carbohydrates | 52g | 19% |
| Sugars | 38g | – |
| Protein | 6g | 12% |
Data Insight: While higher in fat due to the heavy cream, this version has zero cholesterol from egg yolks, which appeals to certain dietary preferences.
Healthier Alternatives for the Recipe
Customizing for dietary needs is easier with no-bake recipes:
- Lower Fat: You can substitute half of the heavy cream with full-fat Greek yogurt. You will need to add 1 teaspoon of powdered gelatin dissolved in water to ensure it sets, but it significantly cuts the calorie count.
- Gluten-Free: Use Gluten-Free Oreos for the crust and filling. The rest of the ingredients are naturally gluten-free.
- Keto-Friendly: Use an almond flour/cocoa crust, a keto-friendly sweetener (powdered Erythritol), and keto-friendly cookies. The high fat content of the dairy fits keto macros perfectly.
Serving Suggestions
Since this cake is rich and creamy, presentation should focus on lightness and contrast:
- Frozen Serving: For a texture similar to an ice cream cake, serve this semi-frozen. Place it in the freezer for 1 hour before slicing.
- Fudge Drizzle: A hot fudge sauce creates a temperature contrast with the cold cheesecake that heightens the flavor experience.
- Fresh Mint: A sprig of mint adds a color pop against the monochrome black and white dessert.
- Espresso Shot: Serve with a shot of hot espresso to pour over the slice (Affogato style).
Common Mistakes to Avoid
Here is why most no-bake cheesecakes fail:
- The “Soup” Incident: This happens if you use “Whipped Topping” (tub) instead of real heavy cream, or if you use low-fat cream cheese. You need the saturated fat for structure.
- Grainy Texture: Using granulated sugar instead of powdered sugar. Cold cream cheese cannot dissolve sugar crystals effectively.
- The Crust Crumble: Not packing the crust tightly enough or not using enough butter. It needs to be very compact to hold the weight of the filling.
- Warm Kitchen: If your kitchen is hot, the cream won’t whip properly. Chill your bowl and whisk in the freezer for 10 minutes before starting.
Storing Tips for the Recipe
Temperature control is everything for this Oreo Cheesecake.
- Fridge: Keep strictly refrigerated. It will soften if left out for more than 30 minutes. It lasts 5 days in the fridge.
- Freezer: This is the best way to store it. Wrap the springform pan in plastic and foil. It keeps for 3 months. Slice it while frozen for perfect, sharp edges, then let the slice thaw on the plate for 20 minutes.
- Transport: If bringing this to a party, freeze it solid first. It will thaw gently during the drive and be perfect upon arrival.
Conclusion
To summarize, the perfect No-Bake Oreo Cheesecake relies on high-quality cold dairy, powdered sugar for smoothness, and a patient chill time. This 5-step method yields a dessert that is lighter than air but rich in flavor.
Is your mixer ready? Start whipping! If you love this oven-free method, leave a comment below with your results and subscribe for more easy dessert hacks.
FAQs
1. Can I use Cool Whip instead of heavy cream? Yes, you can substitute the 2 cups of heavy cream with an 8oz tub of Cool Whip. The texture will be slightly sweeter and less rich, but it is a stable shortcut.
2. My filling is too soft, how do I fix it? If you’ve already made it and it won’t set, your best bet is to freeze it and serve it as an “Oreo Ice Cream Cake.” Next time, ensure you whip the cream to stiff peaks.
3. Can I add gelatin for extra stability? Yes. If you need the cake to sit out at a warm party, dissolve 1 teaspoon of unflavored gelatin in 1 tablespoon of cold water, let it bloom, melt it, and whisk it into the cream cheese before folding in the cream.
4. How do I get the sides to look clean? Run a thin knife or offset spatula under hot water, dry it, and run it around the inside of the springform ring before unlatching it. This separates the cake from the metal cleanly.
5. Can I use double-stuf Oreos? For the filling, yes. For the crust, stick to regular Oreos. The extra cream in Double-Stuf makes the crust too greasy and potentially unstable.
Your feedback helps other cooks succeed. Rate this recipe!
The First-Time Cheesecake Baker
As a cheesecake novice, I found this recipe very approachable. The instructions were clear, especially about not overmixing the filling after adding the eggs. My cake came out smooth and set beautifully. The flavor was amazing—like a giant, creamy Oreo. My one learning curve was with the crust; I should have crushed the cookies even finer, as my crust was a bit crumbly when slicing. Also, make sure your cream cheese is VERY soft. This is a fantastic, impressive recipe for a beginner looking to tackle a classic dessert with a fun twist.
![How To Bake A Perfect [tres leches cake] In 7 Easy Steps](https://monetizegrid.com/wp-content/uploads/2026/02/Untitled-design-2026-02-02T112201.379-768x432.webp)