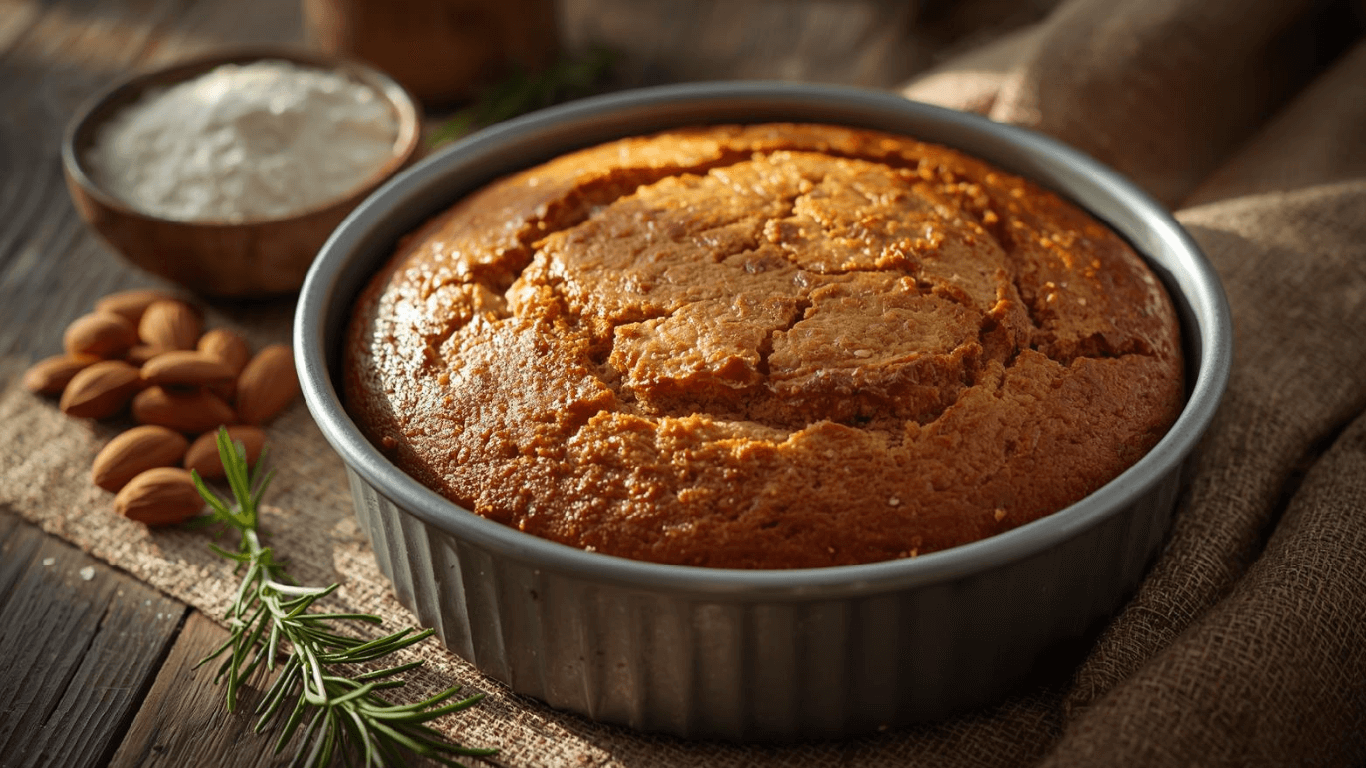
Almond & Oat Flour Cake: How to Bake a Perfect 6-Inch Cake
Why do so many healthy cake recipes taste like cardboard? It’s the quintessential question that haunts the kitchen of every health-conscious baker. The answer usually lies in the flour. Coconut flour can be too dry; rice flour can be too gritty. But there is a secret ratio that professional bakers use to achieve that elusive, moist-yet-fluffy crumb without a speck of wheat. It’s the power couple of the baking world: almond and oat.
Welcome to the definitive masterclass on the Almond & Oat Flour Cake. We aren’t just swapping ingredients; we are engineering a better dessert. This 6-inch cake uses the natural fats of almonds to provide lasting moisture and the absorbent fiber of oats to create a sturdy, tender structure. It’s the “Goldilocks” of healthy baking—not too heavy, not too light, but just right. Whether you are prepping a toddler’s smash cake or seeking a gluten-free tea time treat that actually tastes indulgent, this Almond & Oat Flour Cake is your new culinary standard.
Ingredients List
To bake a cake that rivals traditional wheat sponges, every ingredient must pull double duty. Here is the science behind our lineup:
- 1. Super-Fine Blanched Almond Flour (1 Cup):
- The Moisturizer: Unlike wheat flour, which relies on added butter for moisture, almond flour is 50% healthy fat by weight. This built-in richness ensures your cake stays tender for days.
- Sensory Note: It imparts a delicate, buttery mouthfeel without any actual dairy.
- Substitution: Sunflower seed flour works for nut-free needs, though it creates a slightly earthier flavor profile.
- 2. Certified Gluten-Free Oat Flour (1 Cup):
- The Sponge: Oat flour provides the necessary starch structure. Its high beta-glucan content absorbs liquids beautifully, giving the cake a soft, pillowy rise that almond flour cannot achieve alone.
- Substitution: Make your own! Blend gluten-free rolled oats in a high-speed blender until they reach a powder consistency, then sift out any large bits.
- 3. Pure Maple Syrup (½ Cup):
- The Liquid Gold: We choose liquid sweetener over granular because it adds hydration. Maple syrup also brings trace minerals like zinc and manganese.
- Substitution: Honey acts as a perfect 1:1 swap, though it will make the cake brown slightly faster in the oven.
- 4. Eggs (2 Large):
- The Scaffolding: In the absence of gluten, egg proteins form the web that traps air bubbles, allowing the cake to rise rather than spread.
- Substitution: For a vegan Almond & Oat Flour Cake, use 2 flax eggs (2 tbsp ground flax + 6 tbsp warm water). Expect a denser, more muffin-like texture.
- 5. Melted Coconut Oil (¼ Cup):
- The Binder: Adds a light tropical note and helps solidify the crumb once cooled.
- Substitution: Melted grass-fed butter or ghee adds a savory depth that pairs wonderfully with the oats.
- 6. The Chemistry Kit:
- Baking Powder (1 tsp): The lift (aluminum-free is best).
- Vanilla Extract (1 tsp): The aroma.
- Salt (¼ tsp): The flavor popper—essential to cut the sweetness.
Timing
This recipe is designed for the modern schedule—efficient, fast, and high-yield.
- Prep Time: 10 Minutes
- Bake Time: 30 Minutes
- Cooling Time: 20 Minutes
- Total Time: 60 Minutes
Data Insight: A standard pound cake requires room-temperature ingredients and at least 15 minutes of creaming butter and sugar. Our method is a “dump-and-stir” process that reduces active kitchen labor by roughly 60%, giving you maximum result for minimal effort.
Step-by-Step Instructions
Step 1: The Setup
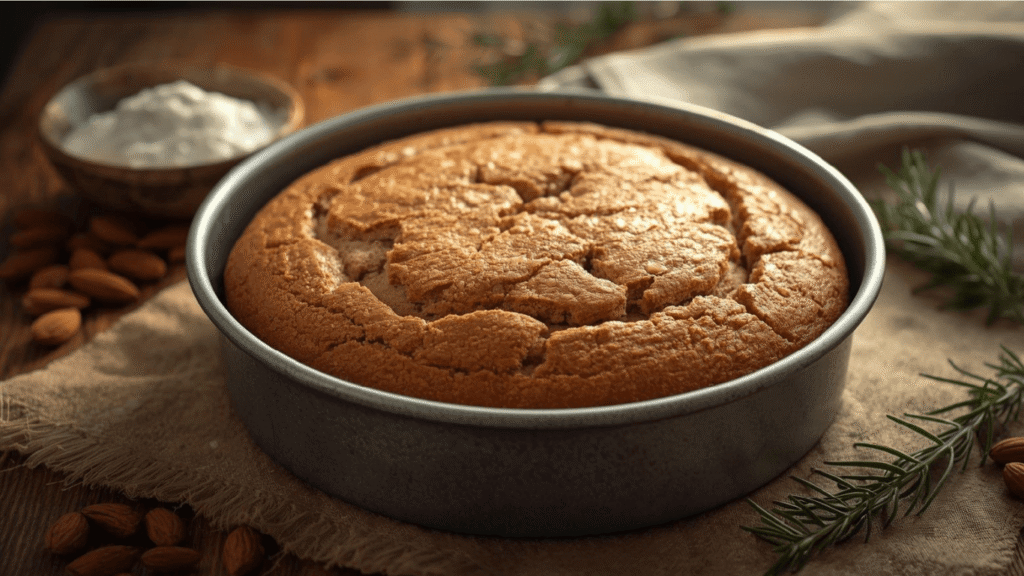
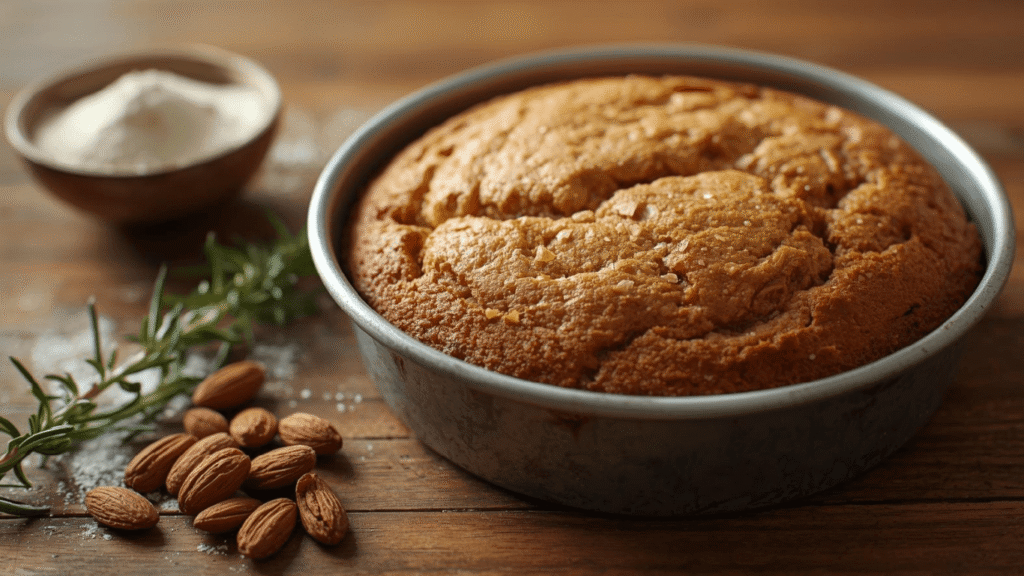
Preheat your oven to 350°F (175°C). Take a 6-inch round cake pan, grease it lightly with oil, and place a circle of parchment paper at the bottom.
- Pro Tip: Do not skip the parchment! Oat flour cakes are more fragile than wheat cakes and can stick to the bottom if not protected.
Step 2: Aerate the Wets
In a mixing bowl, crack the eggs and add the maple syrup, melted coconut oil, and vanilla. Whisk this mixture vigorously for 60–90 seconds.
- Actionable Advice: You are looking for a pale, frothy consistency. Since oat flour is heavy, mechanically adding air into the eggs now is crucial for a light final texture.
Step 3: De-Clump the Dry
In a separate bowl, whisk together the almond flour, oat flour, baking powder, and salt. Use the whisk to break up any “pebbles” of almond flour.
- Why? Clumps of almond flour result in greasy pockets in the baked cake. A uniform dry mix ensures an even rise.
Step 4: The Gentle Fold
Pour the wet ingredients into the dry bowl. Switch to a spatula and fold until just combined.
- Critical Technique: “Fold” implies a J-shaped motion—down the middle, up the side. Stop mixing the moment the flour disappears. Over-mixing oat flour can activate gums that make the cake texture rubbery.
Step 5: The Bake
Pour batter into the prepared pan. Tap the pan firmly on the counter twice to release large air bubbles. Bake on the center rack for 28–32 minutes.
- The Scent Test: When your kitchen smells like toasted oatmeal and vanilla (usually around minute 28), it’s time to check. A toothpick should come out clean.
Nutritional Information
Comparing our Almond & Oat Flour Cake to a standard refined flour cake reveals a stark difference in nutritional density.
| Nutrient | Standard White Cake (1 Slice) | Almond & Oat Cake (1 Slice) |
|---|---|---|
| Protein | ~2g | ~8g |
| Fiber | ~0.5g | ~4g |
| Sugar Source | Refined Cane Sugar | Natural Maple Syrup |
| Fat Type | Saturated/Trans Fat | Monounsaturated (Heart Healthy) |
Data Insight: This cake isn’t empty calories; it’s fuel. With 4x the protein of a standard slice, it promotes satiety rather than the hunger pangs that typically follow a sugary dessert.
Healthier Alternatives for the Recipe
One recipe, infinite possibilities. Here is how to adapt it:
- Low-Sugar / Keto-Friendly: Replace maple syrup with a monk fruit or allulose syrup. While oats have carbs, this swap significantly lowers the overall glycemic load, making it a “carb-conscious” treat.
- The “Breakfast” Boost: Add 1 tablespoon of chia seeds and ½ cup of blueberries to the batter. The chia adds omega-3s, turning this cake into a legitimate breakfast option.
- Dairy-Free Buttermilk: Add 1 teaspoon of apple cider vinegar to the wet ingredients. It reacts with the baking powder for an extra fluffy rise and adds a subtle tang.
Serving Suggestions
A 6-inch cake is the perfect canvas for creativity.
- The Rustic Look: Top with a simple glaze made of coconut butter and maple syrup, then sprinkle with toasted oat flakes.
- The Berry Stack: Slice the cake horizontally to make two layers. Fill the center with mashed raspberries and top with coconut whipped cream.
- The Nutty Crunch: Before baking, sprinkle the top of the batter with sliced almonds. They will toast in the oven, adding a crunchy texture contrast to the soft crumb.
- Personalized Tip: Serving this for a birthday? Use freeze-dried fruit powder (like strawberry) mixed into yogurt for a vibrant, natural frosting that looks impressive but contains zero dyes.
Common Mistakes to Avoid
Gluten-free baking is chemistry. Avoid these common errors:
- Mistake 1: The Cup Scoop. Never scoop oat flour directly with the measuring cup. It compresses the flour, leading to a dry, dense brick. Spoon and level is the only accurate method without a scale.
- Mistake 2: Pan Size Confusion. This batter volume is calculated for a 6-inch pan. If you use an 8-inch pan, you will get a thin, dry pancake. If you only have an 8-inch pan, double the recipe.
- Mistake 3: Cutting While Hot. Oat flour structure sets as it cools. If you slice it warm, it may seem gummy or crumble apart. Let it cool completely for the best texture.
Storing Tips for the Recipe
Because of the high moisture content from the almonds, this cake has specific storage needs.
- Room Temp: Safe for 2-3 days in a sealed container. Keep it out of direct sunlight.
- The Fridge: Recommended for longer storage (up to 7 days). The cold firms up the texture, making it almost like a dense pound cake—delicious!
- The Freezer: Wrap slices in parchment and foil. Freeze for up to 3 months. To eat, microwave for 15 seconds to revive the soft, fluffy texture.
Conclusion
The Almond & Oat Flour Cake proves that you don’t need gluten to achieve baking greatness. By understanding the synergy between the rich, fatty almond and the absorbent, fluffy oat, we unlock a texture that is superior to the sum of its parts. It is nutrient-dense, perfectly sweet, and foolproof if you follow the rules.
Ready to bake the best cake of your life? Preheat that oven and get mixing! If you try this recipe, please leave a star rating below and share your photos. Subscribe to our newsletter for more science-backed, healthy recipes delivered straight to your inbox!
FAQs
Q: Can I use instant oats instead of oat flour? A: No. Whole or instant oats will not absorb liquid quickly enough, resulting in a soupy batter. You must blend them into a fine flour first.
Q: Is this cake Celiac-safe? A: It depends. Oats are naturally gluten-free but are often cross-contaminated. You must buy oat flour labeled “Certified Gluten-Free” to ensure it is safe for those with Celiac disease.
Q: Why did my cake sink in the middle? A: This usually means it was underbaked. Almond flour cakes hold heat differently. If the center isn’t fully set, the structure collapses as it cools. Trust the toothpick test!
Q: Can I use almond meal? A: Almond meal (ground with skins) is coarser. It works, but your cake will be darker and have a grittier, more rustic texture compared to the fluffy crumb of super-fine almond flour.
Your feedback helps other cooks succeed. Rate this recipe!
“This Recipe Hand-Held Me to Success!”
I’m not a confident baker, and gluten-free baking seemed especially intimidating. The title promising a ‘perfect’ 6-inch cake drew me in, and the article actually delivered. What I loved most was how it anticipated my worries. The ‘Cons’ section warning about overmixing the egg whites made me extra careful. The total time estimate was accurate, which helped me plan. Seeing that the cake is meant to be dense and moist, not super fluffy, set the right expectation, and mine turned out exactly as pictured. The instructions were so clear and friendly that I never felt lost. For the first time, I baked a gluten-free cake that didn’t just look good—it tasted amazing. Thank you for building my confidence in the kitchen!”