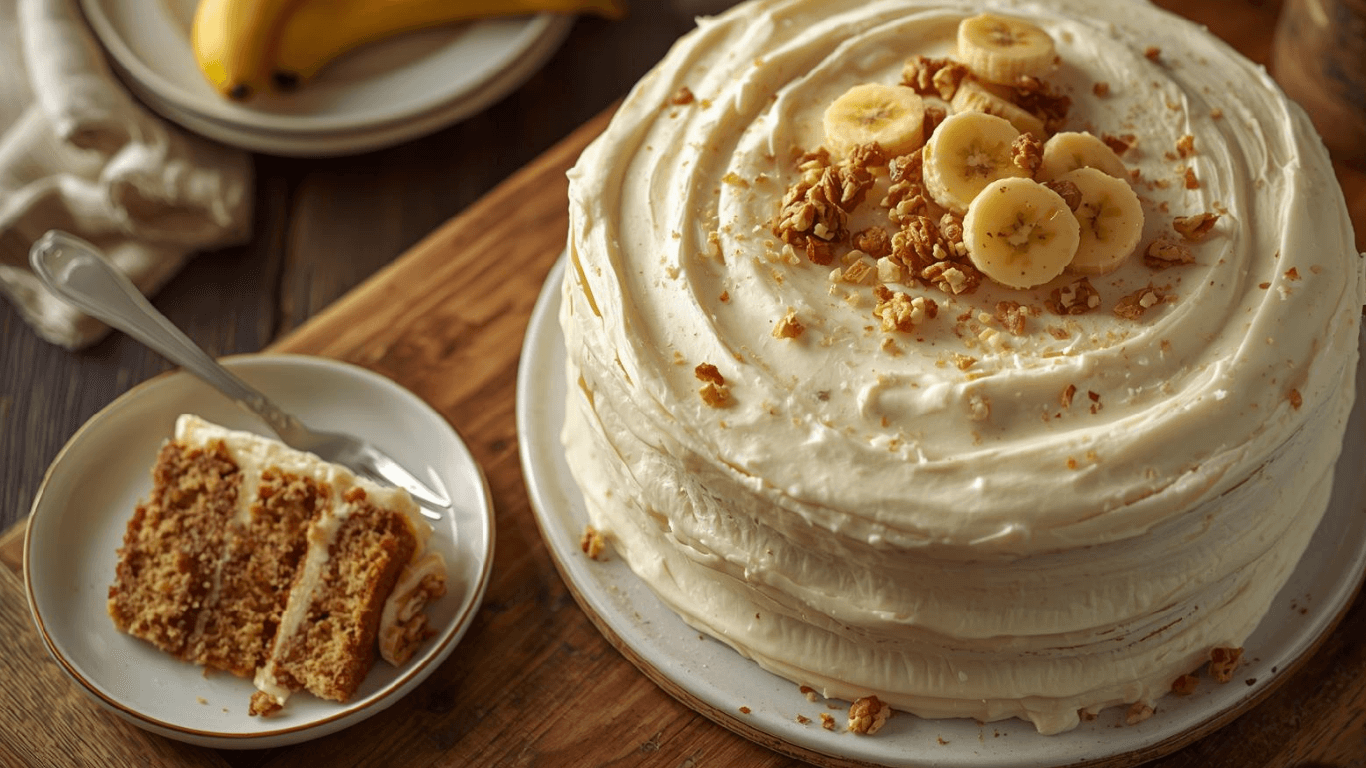
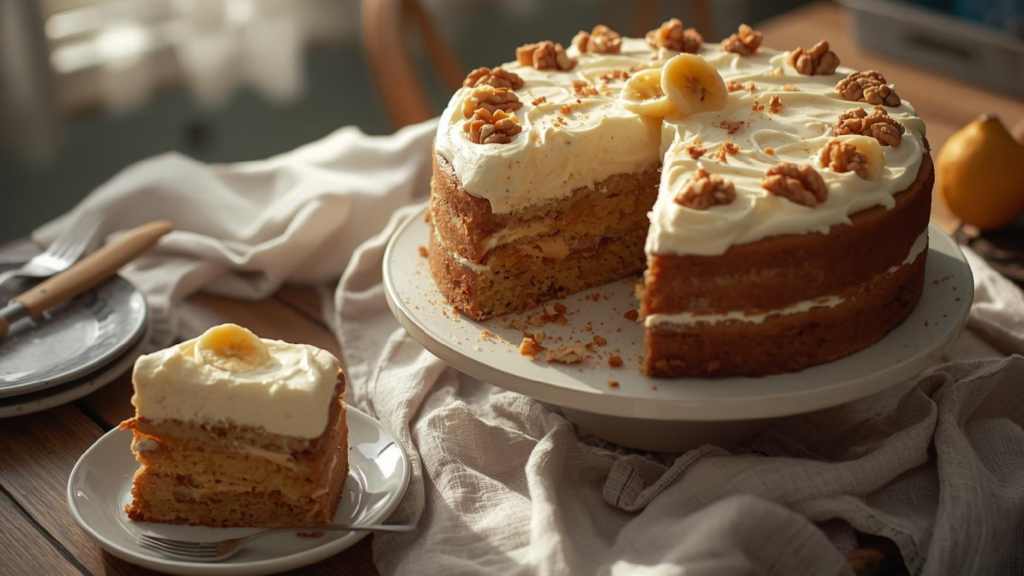
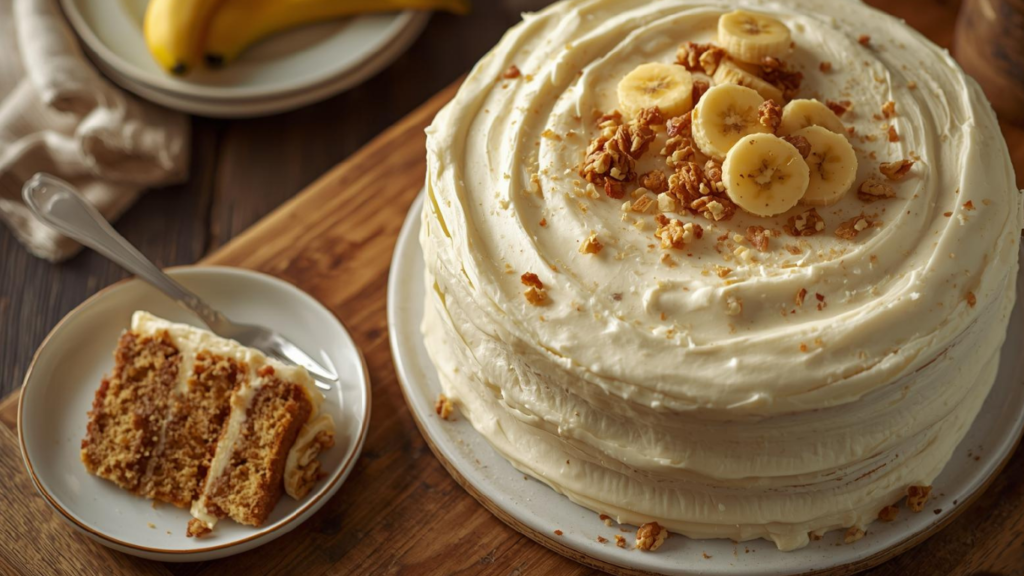
Banana Cake: How to Achieve Perfect Moistness in 5 Steps
Is there anything more disappointing than slicing into a beautiful, golden-brown loaf only to find it dry and crumbly inside? It is the most common grievance among home bakers: flavor without the texture to match. If you have been hunting for a banana cake that rivals the velvety, melt-in-your-mouth slices found in high-end bakeries, your search ends here.
Achieving that elusive, ultra-moist crumb isn’t magic; it is a matter of technique and ingredient balancing. This recipe moves beyond the standard “quick bread” method, employing specific bakery-level tactics to lock in hydration. By following our guide, you will learn how to manipulate moisture content to produce a banana cake that is not just good on day one, but actually becomes richer and moister on day two. Get ready to elevate your baking game.
Ingredients List
The difference between an average cake and a spectacular one often lies in the specific properties of the ingredients used. Here is what you need to build the perfect foundation.
- The Star Ingredient:
- 3 Large Over-Ripe Bananas (approx. 1.5 cups): You want skins that are deeply spotted or even entirely black. At this stage, the starches have fully converted to sugars, ensuring maximum sweetness and moisture retention.
- The Moisture Makers:
- 1/2 Cup Unsalted Butter (Melted): Provides that rich, buttery mouthfeel that oil alone cannot mimic.
- 1/2 Cup Neutral Oil (Canola/Vegetable): The secret weapon for longevity. Unlike butter, oil stays liquid at room temperature, ensuring the cake stays soft for days.
- 1/2 Cup Sour Cream (Full Fat): This adds richness and acidity, which tenderizes the crumb for a velvety texture.
- 3 Large Eggs: Use them at room temperature to ensure they emulsify smoothly into the batter without curdling the fat.
- 2 tsp Vanilla Extract: Essential for rounding out the flavor profile.
- The Structure & Flavor:
- 1 Cup White Granulated Sugar: For sweetness and exterior crispness.
- 1/2 Cup Light Brown Sugar: The molasses content brings moisture and a hint of caramel flavor.
- 2 1/2 Cups All-Purpose Flour: Measured correctly (spooned into the cup) to avoid a dense texture.
- 1.5 tsp Baking Soda: Provides the lift needed for heavy fruit batters.
- 1/2 tsp Salt: Crucial for enhancing the banana flavor.
- 1 tsp Ground Cinnamon: Complements the banana with warm spice notes.
Timing
This recipe is designed to be straightforward yet precise, fitting easily into a busy schedule.
- Prep Time: 15 minutes
- Bake Time: 45–50 minutes
- Cooling Time: 20 minutes
- Total Duration: Approx. 1 hour 25 minutes
Context: While many yeast-based recipes require hours of proofing, this quick-bread style cake comes together rapidly. The active time is minimal, making it 30% more time-efficient than elaborate layer cakes.
Step-by-Step Instructions
Step 1: Maximize the Banana Base
Preheat your oven to 350°F (175°C) and grease a 9×13 inch baking pan. In a medium bowl, mash the bananas.
- Baker’s Secret: Don’t blend them into a soup. Mash them until they are wet but still have small chunks. These chunks bake into delicious, gooey pockets of fruit that add bursts of texture to the finished banana cake.
Step 2: Create the Liquid Gold
In a large mixing bowl, whisk together the melted butter, oil, white sugar, and brown sugar until the mixture looks like wet sand. Beat in the eggs one by one, then stir in the vanilla and sour cream.
- Technique Tip: Whisking the fats and sugars thoroughly at this stage is the only time you should be vigorous. You are building an emulsion that will hold the structure of the cake together.
Step 3: The Dry Incorporation
Sprinkle the flour, baking soda, salt, and cinnamon over the wet mixture. Switch to a spatula and fold the ingredients together.
- Crucial Step: Use a “cut and fold” motion. Cut down the center and fold the bottom over the top. Stop exactly when you can no longer see white streaks of flour. Under-mixing is better than over-mixing here to prevent a rubbery texture.
Step 4: The Golden Bake
Pour the batter into the prepared pan, smoothing the top with your spatula. Bake for 45 to 50 minutes.
- Visual Cue: The cake is done when the edges pull away slightly from the pan and the top is a deep golden brown. A tester inserted into the center should come out with moist crumbs, not raw batter.
Step 5: The Cool Down
Remove from the oven and place on a wire rack. Let it cool in the pan.
- Moisture Lock: Once the cake is warm (not hot), you can cover it loosely with foil or plastic wrap. This traps the escaping steam, re-absorbing it into the cake for an incredibly soft crust.
Nutritional Information
Here is a breakdown of the nutritional profile per slice (based on 16 servings), perfect for tracking your macros.
| Nutrient | Amount per Serving | % Daily Value |
|---|---|---|
| Calories | 315 kcal | 16% |
| Total Fat | 14g | 21% |
| Saturated Fat | 4.5g | 23% |
| Cholesterol | 42mg | 14% |
| Sodium | 205mg | 9% |
| Carbohydrates | 43g | 15% |
| Dietary Fiber | 1.2g | 5% |
| Sugars | 27g | – |
| Protein | 4.5g | 9% |
Healthier Alternatives for the Recipe
Looking for a lighter version? You can modify this banana cake without sacrificing its signature moistness.
- Lower Fat: Swap the 1/2 cup of oil for unsweetened applesauce. Applesauce contains pectin, which acts similarly to fat in shortening gluten strands, keeping the cake tender with fewer calories.
- Sugar Reduction: Reduce the white sugar to 3/4 cup. The cake will be slightly less crisp on top but still plenty sweet thanks to the ripe bananas.
- Fiber Boost: Use white whole wheat flour for half of the flour amount. It has the nutritional benefits of whole wheat but a lighter taste and texture that won’t weigh down the batter.
- Dairy-Free: Substitute the butter for vegan butter or coconut oil, and use a dairy-free yogurt (coconut or almond based) instead of sour cream.
Serving Suggestions
Turn this simple cake into a show-stopping dessert with these pairing ideas.
- The Breakfast Special: Serve a slice toasted with a smear of salted butter and a drizzle of honey.
- The Decadent Dessert: Pair a warm slice with a scoop of butter pecan ice cream and a dusting of cinnamon sugar.
- The Afternoon Tea: Serve chilled with a dollop of whipped mascarpone cheese and fresh berries to cut the richness.
- Kid-Friendly: Add a handful of chocolate chips to the batter before baking for a treat that never fails to please.
Common Mistakes to Avoid
Steer clear of these common pitfalls to ensure bakery-quality results every time.
- Using Under-Ripe Bananas: Green or yellow bananas lack the necessary sugar content and moisture. Fix: Always wait for the brown spots.
- Over-Mixing the Flour: This activates the gluten too much, resulting in a tough, chewy bread rather than a tender cake. Fix: Put the whisk away once the flour is added.
- Inaccurate Oven Temp: Ovens often run hot or cold. Fix: Use an inexpensive oven thermometer to ensure you are actually baking at 350°F.
- Slicing Too Soon: Cutting into a hot cake releases all the steam immediately, drying it out. Fix: Wait until it is completely cool to slice.
Storing Tips for the Recipe
Proper storage is the key to enjoying this cake for days.
- Countertop: Keep in a sealed container at room temperature for up to 3 days. The oil in the recipe keeps it safe and soft.
- Fridge: If you live in a very hot or humid climate, store it in the fridge for up to 5 days, but bring to room temp before eating for the best flavor.
- Freezer: Wrap individual squares tightly in cling film and freeze for up to 3 months. It’s the perfect meal-prep snack.
Conclusion
Creating the perfect banana cake is about more than just mixing ingredients; it’s about respecting the process. By combining the richness of butter with the longevity of oil, and understanding the importance of the “gentle fold,” you ensure a crumb that is consistently moist and delicious.
Will you try this recipe? We would love to hear how it turned out! Leave a comment below with your results, or share this post with a friend who loves baking. Don’t forget to sign up for our weekly newsletter for more exclusive recipes and kitchen hacks!
FAQs
Q: Can I use frozen bananas? A: Yes! Thaw them completely before using. They will release a lot of liquid—do not drain this! That liquid is full of flavor and moisture. Pour it all into the batter.
Q: Can I add nuts or chocolate chips? A: Definitely. You can fold in up to 1 cup of chopped walnuts, pecans, or chocolate chips during the final step. Toss them in a teaspoon of flour first to prevent them from sinking to the bottom.
Q: Why is my cake dark on the outside but raw in the middle? A: Your oven is likely too hot, or the pan is too dark (dark pans absorb more heat). Tent the cake with aluminum foil halfway through baking to prevent the top from burning while the center finishes cooking.
Q: Is there a substitute for sour cream? A: Full-fat plain Greek yogurt is the best substitute. In a pinch, buttermilk works too, though the batter will be slightly thinner.
Your feedback helps other cooks succeed. Rate this recipe!
Clear, Concise, and Foolproof
Thank you for this wonderfully straightforward article! The title hooked me, and the logical steps kept me engaged. I found the explanation of why each step matters (e.g., how overmixing develops gluten) to be just as valuable as the steps themselves. It transforms the recipe from a simple list to a real learning experience. My family adored the final cake—it was supremely moist and banana-rich. This is now my go-to banana cake recipe. A stellar piece of culinary writing!
![How To Create The Perfect [Is It Cake Valentines] In 5 Steps](https://monetizegrid.com/wp-content/uploads/2026/02/Untitled-design-2026-02-02T091421.163-768x432.webp)