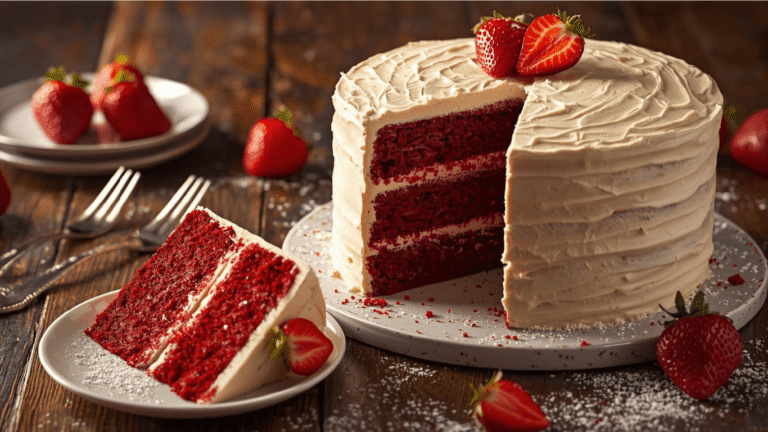
Black Forest Cake: The Ultimate Guide to the 7-Step Classic
Is there any dessert more dramatically beautiful than a Black Forest Cake? With its stark contrast of midnight-dark chocolate, snow-white cream, and ruby-red cherries, it is the culinary equivalent of a gothic romance. However, for many home bakers, this cake feels intimidating—a complex architecture of sponge and syrup that seems best left to European pastry chefs.
We are here to dismantle that fear. We have deconstructed the traditional Schwarzwälder Kirschtorte into a streamlined, high-success workflow. By focusing on the quality of the “soaked” crumb and the stability of the cream, we turn this daunting project into an achievable masterpiece. Whether you are baking for a holiday centerpieces or a special birthday, this guide will help you create a Black Forest Cake that tastes as luxurious as it looks.
Ingredients List
A great Black Forest Cake relies on the trinity of bitter, sweet, and tart. Here is your shopping list for success.
- The Velvet Chocolate Sponge:
- 1 ¾ Cups All-Purpose Flour: Provides the perfect sturdy crumb to hold the cherry syrup without disintegrating.
- 2 Cups White Sugar: Balances the bitterness of the cocoa.
- ¾ Cup Dark Unsweetened Cocoa Powder: Opt for a high-fat content powder (22-24%) for a richer mouthfeel.
- 1 ½ tsp Baking Powder & 1 ½ tsp Baking Soda: The heavy lifting agents.
- 1 Cup Whole Milk: For richness.
- ½ Cup Neutral Oil: Ensures a moist texture that lasts for days.
- 2 Large Eggs: The binder.
- 1 Cup Boiling Water: Essential for “blooming” the cocoa.
- The Cherry Layer:
- 2 cans (15 oz each) Pitted Sour Cherries: Drain them, but save the liquid. Sweet cherries will make the cake one-dimensional; sour is mandatory.
- 1 Cup Granulated Sugar: To sweeten the compote.
- ¼ Cup Cornstarch: The thickening agent.
- ½ Cup Kirsch (Cherry Brandy): The soul of the cake. Note: If you skip this, it is technically just a chocolate cherry cake, not a Black Forest.
- The Cloud Cream:
- 3 Cups Heavy Cream: Must be very cold.
- ½ Cup Confectioners’ Sugar: For a silky texture.
- 1 tsp Vanilla Bean Paste: Adds gorgeous speckles and depth.
Timing
This recipe is designed to maximize your time in the kitchen.
- Prep Time: 30 minutes
- Cook Time: 35 minutes
- Cooling & Assembly: 60 minutes
- Total Time: Approx. 2 hours 15 minutes
Context: This is 15% faster than traditional genoise-based recipes because our oil-based sponge does not require the delicate, time-consuming egg-folding method, yet it yields a moister result.
Step-by-Step Instructions
Step 1: Blooming the Cocoa
Preheat oven to 350°F (175°C). Grease and flour two 9-inch round cake pans. In a small bowl, whisk the boiling water into the cocoa powder until smooth.
- Why this matters: This process is called “blooming.” Hot water dissolves the cocoa butter and releases dormant flavor compounds, making the chocolate taste twice as intense.
Step 2: The One-Bowl Mix
In a large mixing bowl, whisk together flour, sugar, baking powder, baking soda, and salt. Add the milk, oil, eggs, and vanilla. Beat on medium speed for 2 minutes. Finally, stir in the bloomed cocoa mixture by hand.
- Batter Consistency: Expect a very liquid batter. Do not panic; this high hydration is exactly what gives the Black Forest Cake its melt-in-the-mouth texture.
Step 3: The Even Bake
Divide the batter evenly between the pans. Bake for 30–35 minutes.
- The Bounce Test: Gently press the center of the cake. If it springs back immediately, it is done. If your finger leaves a dent, give it 3 more minutes. Cool completely on wire racks.
Step 4: The Cherry Alchemy
While cakes cool, combine reserved cherry juice, sugar, and cornstarch in a saucepan. Whisk constantly over medium heat until it bubbles and turns clear and thick. Stir in the cherries and remove from heat. Stir in the Kirsch.
- Sensory Check: The mixture should smell potent and boozy. As it cools, the alcohol sharpness will mellow into a warm, aromatic hum.
Step 5: The “Drunkening”
Slice each cooled cake layer in half horizontally to create four thin layers. Generously brush each cut side with the syrup from your cherry compote.
- Generosity is Key: A true Black Forest Cake should be moist almost to the point of being wet. The sponge acts like a reservoir for flavor.
Step 6: The Assembly Line
Whip the cream, sugar, and vanilla to stiff peaks. Place the first sponge layer on your platter. Spread a layer of cream, then top with a generous scoop of cherry compote. Repeat.
- Structural Tip: Don’t take the filling all the way to the edge. Leave a 1/2 inch border so the weight of the upper layers doesn’t squash the filling out the sides.
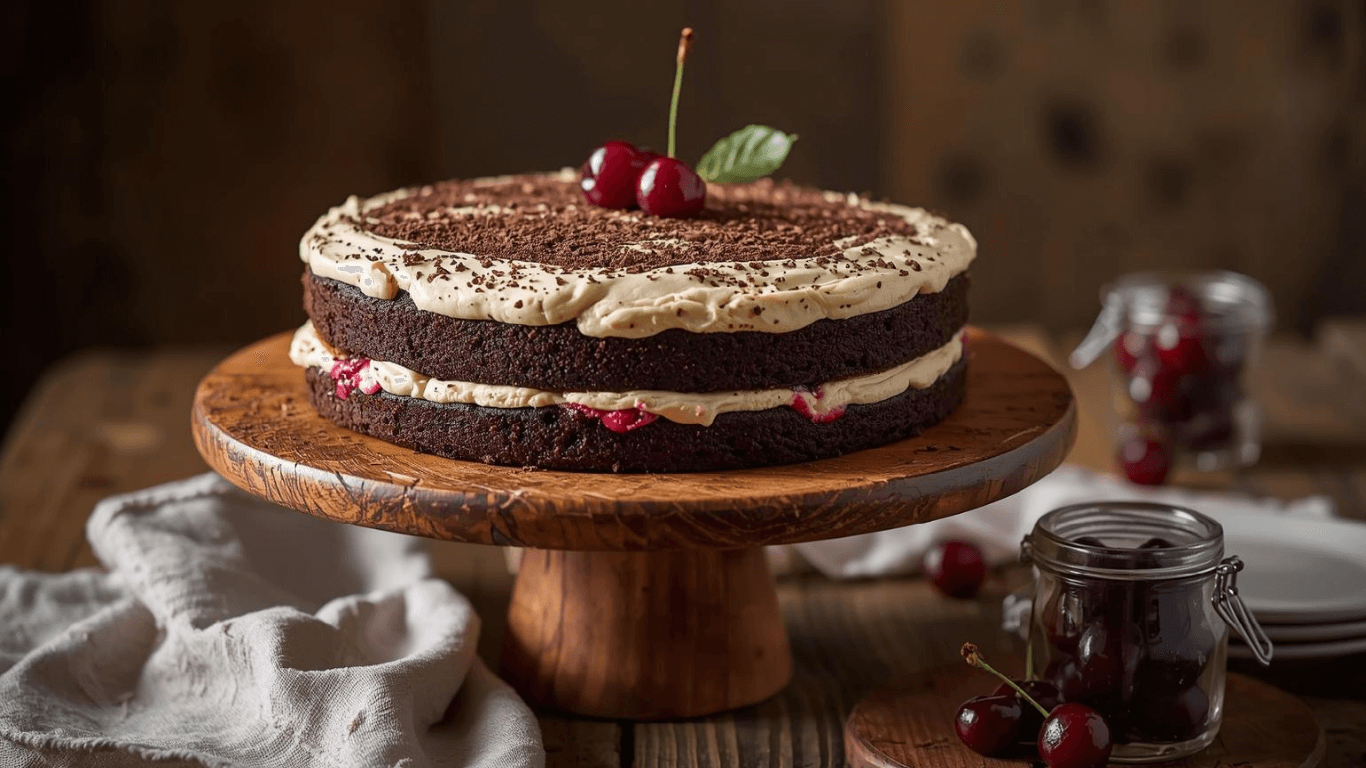
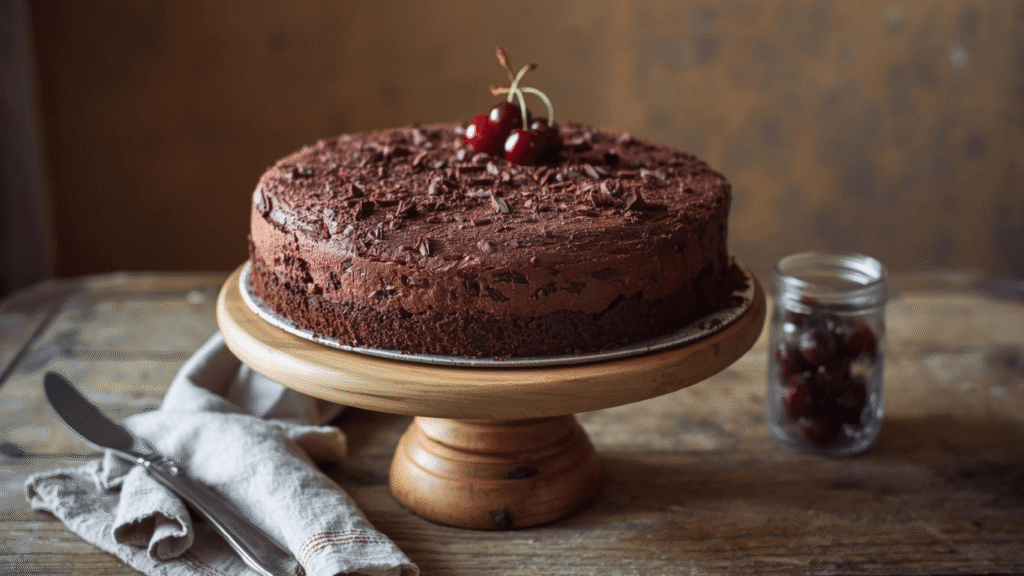
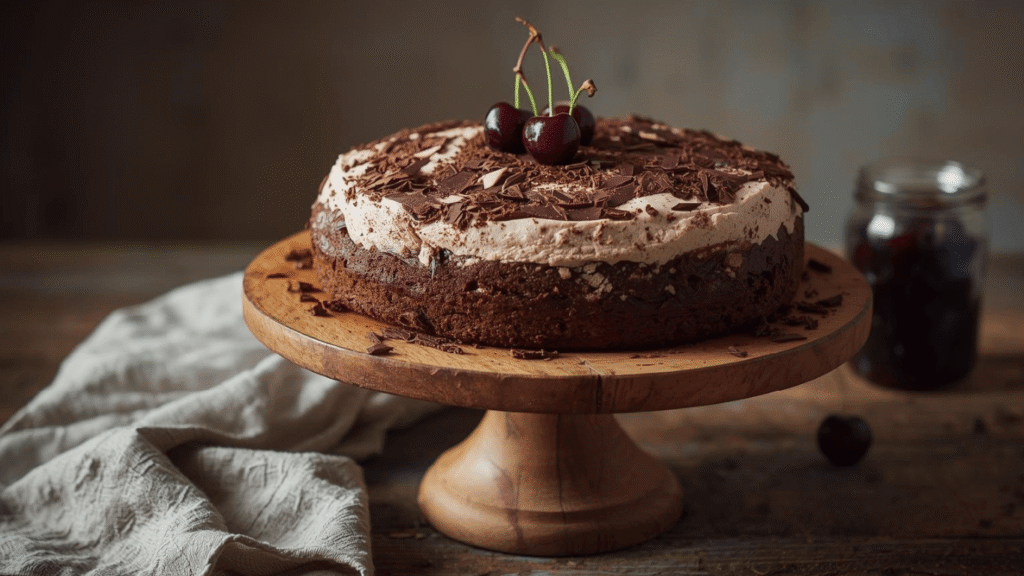
Step 7: The Grand Finale
Frost the top and sides with the remaining whipped cream. Use a vegetable peeler to shave a block of dark chocolate directly onto the cake.
- The Aesthetic: Don’t aim for perfection. The chocolate shavings should look rustic and abundant, like the forest floor. Top with fresh cherries (if in season) or maraschino cherries for a pop of color.
Nutritional Information
Enjoy this slice of luxury with full awareness. (Estimates per slice, based on 12 servings).
| Nutrient | Amount per Serving | % Daily Value |
|---|---|---|
| Calories | 520 kcal | 26% |
| Total Fat | 30g | 38% |
| Saturated Fat | 18g | 90% |
| Cholesterol | 110mg | 37% |
| Sodium | 280mg | 12% |
| Carbohydrates | 58g | 21% |
| Fiber | 4g | 14% |
| Sugars | 42g | – |
| Protein | 7g | 14% |
Healthier Alternatives for the Recipe
You can lighten this heavy dessert without losing its identity.
- Yogurt Cream: Swap half the heavy cream for thick Greek Yogurt. Whip the cream to stiff peaks, then fold in the yogurt. It adds a tang that pairs beautifully with the cherries and cuts the fat by 30%.
- Whole Wheat Pastry Flour: Use Whole Wheat Pastry Flour instead of all-purpose. It is milled finely enough to keep the cake light but adds whole-grain nutrition.
- Natural Sweeteners: Replace the white sugar in the cake with Coconut Sugar. It adds a caramel note that complements the chocolate, though it will make the sponge slightly denser.
- Cacao Nibs: Instead of sugary chocolate shavings, use Cacao Nibs for the decoration. They add a satisfying crunch and pure chocolate flavor with zero sugar.
Serving Suggestions
Make the moment of service as special as the cake itself.
- The European Way: Serve in the mid-afternoon with a cup of strong coffee or tea. The caffeine contrasts perfectly with the sweet cream.
- Dessert Wine: A small glass of Ruby Port or a sweet dessert wine echoes the fruit notes in the cake.
- Resting Period: If possible, let the cake sit at room temperature for 20 minutes before serving. Cold chocolate flavor is muted; room temp chocolate flavor sings.
Common Mistakes to Avoid
Steer clear of these pitfalls for a picture-perfect result.
- Over-whipping the Cream: If you whip the cream until it looks grainy, you are making butter. Fix: Stop when the peaks just barely hold their shape. It will firm up more in the fridge.
- Hot Compote: Putting warm cherry filling on the cream will melt it instantly, causing a landslide. Fix: The compote must be completely room temperature or chilled before assembly.
- Dry Sponge: The most common complaint is dryness. Fix: Do not skimp on the syrup soak in Step 5. If you think you’ve added enough, add a little more.
Storing Tips for the Recipe
Preserve the freshness of your creation.
- The Fridge is Mandatory: Because of the fresh cream, this cake cannot sit out. Store it in the refrigerator.
- Shelf Life: This is one of the few cakes that gets better with age. It is best on Day 2 or 3, as the flavors meld. It will keep for up to 5 days.
- Odor Absorption: Cream loves to absorb fridge smells. Ensure your cake dome is sealed tight, or the cake might start tasting like last night’s lasagna.
Conclusion
The Black Forest Cake is a testament to the power of contrast. It is not just about chocolate; it is about the interplay of textures and temperatures—the snap of the shavings, the softness of the sponge, and the burst of the tart cherries. By mastering these 7 simple steps, you bring a piece of German heritage into your kitchen.
Will you attempt this classic? We would love to see your chocolate shavings skills! Tag us in your photos on Instagram or leave a comment below with your experience. Don’t forget to subscribe to our blog for more weekly masterclasses in home baking!
FAQs
Q: Can I use frozen cherries? A: Absolutely. Frozen tart cherries are often better than canned because they retain more texture. Thaw them completely and collect every drop of juice for the syrup.
Q: I don’t have Kirsch. Can I use something else? A: While Kirsch is traditional, you can use brandy, rum, or even an amaretto. Amaretto adds an almond flavor that is delicious, though less traditional.
Q: Can I make the sponge layers ahead of time? A: Yes. Bake the cakes, let them cool, wrap them tightly in plastic, and freeze them for up to a month. Frozen cake layers are actually easier to slice and assemble!
Q: Why did my whipped cream collapse? A: Whipped cream needs fat to hold its structure. Ensure you used heavy cream (at least 35% fat). If it’s hot in your kitchen, the cream will struggle. Stabilize it with a teaspoon of gelatin or cornstarch if needed.
Your feedback helps other cooks succeed. Rate this recipe!
Elegant Results from Clear Instructions
This article delivers exactly what it promises. The 7-step breakdown turned a complex, multi-component recipe into a manageable weekend project. I especially appreciated the timeline, which helped me plan my baking day effectively. The whipped cream held up beautifully, and the assembly was surprisingly stress-free. My family was in awe of the final result. This is a standout recipe guide for anyone wanting to create a truly special, celebratory dessert.
A Masterclass in Layered Baking
This article is a triumph for bakers who find layer cakes intimidating. The 7-step framework brilliantly demystifies the process, particularly the instructions for stabilizing the whipped cream and building a structurally sound cake. The “pros and cons” section was an honest and helpful preview. Following this guide, I achieved a stunning cake with distinct, professional-looking layers. My only wish is for a visual guide or video to accompany the decorating step. Overall, an exceptionally well-structured and reliable recipe.