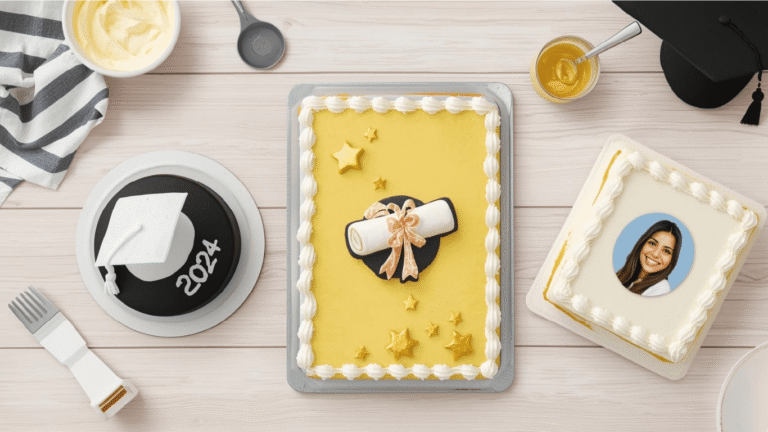
How to Decorate Graduation Sheet Cakes in 5 Easy Steps
Did you know that while tiered cakes often dominate Pinterest feeds, Graduation Sheet Cakes remain the logistical champion of successful parties, feeding 40% more guests per square inch than their round counterparts? In the high-stakes world of graduation planning—where guest lists can swell from 20 to 50 overnight—efficiency is king. Yet, there is a pervasive myth that choosing a rectangular format means sacrificing elegance for utility.
If you have been searching for Graduation Sheet Cakes that bridge the gap between “bulk cafeteria dessert” and “high-end boutique patisserie,” you have found your guide. We are debunking the idea that you need professional fondant skills to make a statement. By mastering five fundamental decorating techniques—from the “invisible” crumb coat to the “toothpick tracing” hack—you can transform a standard 9×13 pan into a personalized edible billboard. Whether you are celebrating a high school football captain or a university medical graduate, these steps will ensure your cake is as memorable as the diploma itself.
Ingredients List
To execute a professional-grade sheet cake, we need a “High-Yield Sponge” that stays moist even when cut into small squares (increasing surface area exposure), and a frosting that is stable enough to hold sharp edges.
The High-Yield Sponge (For a 9×13 inch pan):
- Cake Flour (2 ½ cups, sifted): The lower protein content is essential for a tender crumb that doesn’t feel heavy or “bready.”
- Vegetable Oil (2/3 cup): Unlike butter, oil remains liquid at room temperature, ensuring the cake stays moist for days on the counter.
- Granulated Sugar (1 ½ cups): Provides structure and sweetness; essential for the crust.
- Sour Cream (1 cup, full fat): The acidity tenderizes the gluten strands and adds richness.
- Eggs (3 large, room temp): The binding agent for the structure.
- Vanilla Extract (1 tbsp): Flavor foundation; use clear vanilla if you want a pure white sponge.
- Baking Powder (2 tsp) & Soda (1/2 tsp): Dual leavening for a flat, even rise.
The Decorating Arsenal:
- Crusting Buttercream (4 cups): A high-ratio shortening/butter blend that forms a slight shell, perfect for smoothing and piping crisp lines.
- Gel Food Colors: To match school colors without thinning the icing consistency.
- Piping Tips: A #1M (Open Star) for borders and a #3 (Round) for writing.
- Offset Spatula: The primary tool for achieving that glass-like flat top.
- School Spirit Sprinkles: Custom blends to match the graduate’s alma mater.
Timing
Sheet cakes are the time-management hero of the baking world. Here is the efficiency breakdown for this project:
- Preparation: 20 minutes
- Baking Time: 30-35 minutes (Sheet cakes bake faster than deep rounds due to larger surface area).
- Cooling Time: 90 minutes (Must be completely cool to frost).
- Decorating Time: 45 minutes.
- Total Time: Approx. 3 hours.
Data Insight: A standard round cake requires leveling, torting (cutting layers), and filling between stacks. Graduation Sheet Cakes eliminate 60% of the structural assembly time, allowing you to focus entirely on the surface decoration and “curb appeal.”
Step-by-Step Instructions
Step 1: The Flat Canvas Bake
Preheat oven to 350°F (175°C). Grease your 9×13 pan and line the bottom with parchment paper.
- The Secret: Wrap “bake even strips” (damp fabric strips) around the outside of the pan. This cools the metal edges, forcing the cake to rise evenly rather than setting the edges early and doming in the center. A flat cake means you don’t have to waste time (and cake) cutting off the hump later.
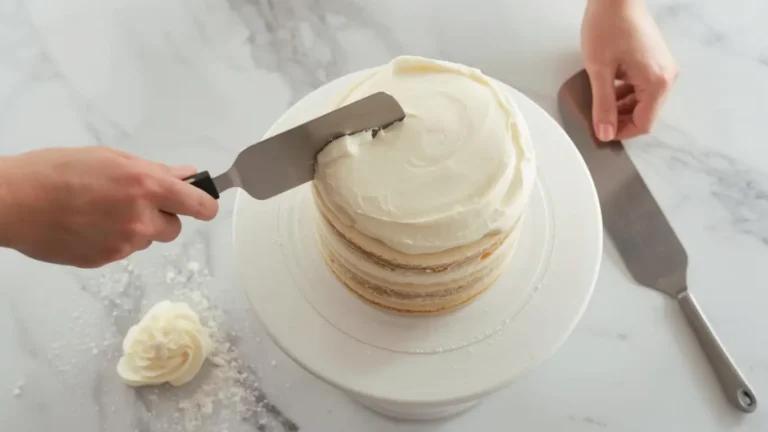
Step 2: The “Snow Plow” Crumb Coat
Once cooled, turn the cake onto a large board. Apply a thin layer of white buttercream.
- Technique: Use a large offset spatula. Push a wave of frosting ahead of your spatula like a snow plow. Do not let the metal touch the cake crumbs.
- The Chill: Refrigerate for 20 minutes. This locks loose crumbs into a “shell,” ensuring your final layer is pristine and white, not speckled with brown cake bits.
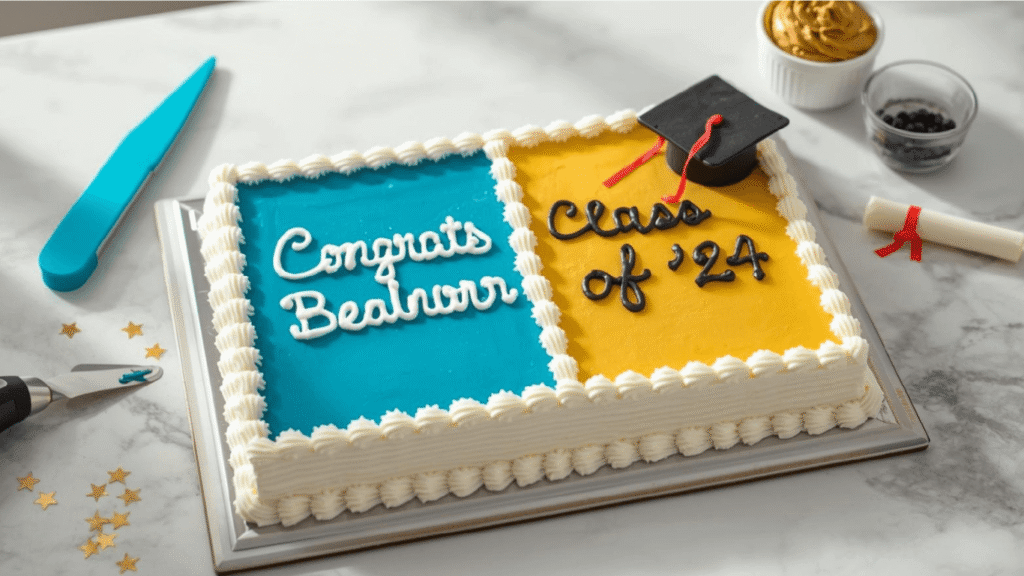
Step 3: The “School Spirit” Border
Tint 1 cup of frosting in the school’s primary color. Fit a piping bag with a #1M tip.
- The Shell Border: Hold the bag at a 45-degree angle to the edge of the cake. Squeeze, let the frosting fan out, then pull away quickly to create a tail. Start the next shell on top of the previous tail.
- Why this works: A thick textured border frames the “message area,” drawing the eye inward and hiding any imperfect edges on the side of the cake.
Step 4: The Central Message
This is the high-pressure moment. Fit a bag with a #3 round tip and fill with a contrasting dark color (or white if the base is dark).
- The Hack: Do not write directly on the cake first. Use a toothpick to gently etch your message (“Congrats Grad!”) into the crusting buttercream. If you mess up, smooth it over with your finger and try again. Once perfect, trace over your toothpick lines with the piping bag.
- Semantic Tip: Keep it short. “Class of 2024” is easier to center than “Congratulations on your Graduation, Jonathan!”
Step 5: The “Confetti” Finish
Using the school’s secondary color, add accents.
- Placement: Do not throw sprinkles randomly. Place clusters of sprinkles or edible gold stars in the corners and near the text.
- The Diploma: If you have leftover fondant, roll a small white tube and tie it with a ribbon of frosting. Place it diagonally in the bottom right corner for a 3D element.

Nutritional Information
Sheet cakes are easier to portion control than wedges. Per 2×2 inch square (Yields 24 servings):
| Nutrient | Amount per Serving | Daily Value % |
|---|---|---|
| Calories | 320 kcal | 16% |
| Total Fat | 16g | 20% |
| Saturated Fat | 6g | 30% |
| Carbohydrates | 42g | 15% |
| Sugars | 30g | – |
| Protein | 3g | 6% |
Data Insight: Because sheet cakes typically have a higher cake-to-frosting ratio than tiered cakes (which have frosting between every layer), they often contain 15-20% less sugar per volume, making them a slightly lighter option for guests who find boutique cakes too rich.
Healthier Alternatives for the Recipe
Feeding a crowd means navigating dietary restrictions. Here is how to adapt the sheet cake:
- The “Poke Cake” Method (Moisture Boost):
- Poke holes in the warm cake and pour sugar-free gelatin or coconut milk over it. This adds flavor and moisture without relying on heavy buttercream fats.
- Gluten-Free Base:
- Use a high-quality GF flour blend.
- Tip: Add an extra egg yolk. GF flours lack gluten structure; the lecithin in the yolk acts as a binder to prevent the square from crumbling when cut.
- Whipped Topping Swap:
- Replace buttercream with stabilized whipped cream (whipped cream + gelatin). It drastically reduces the sugar load and feels lighter on the palate, though note that it cannot be intricately piped for borders.
Serving Suggestions
The logistics of serving a sheet cake are unmatched.
- The Grid Cut: Unlike round cakes, sheet cakes are designed for a grid cut. Use a long chef’s knife dipped in hot water to get clean, sharp 2×2 inch squares.
- Plating: Serve on square paper plates that match the school colors.
- Pairing: A scoop of vanilla bean ice cream is traditional, but a tart lemon sorbet pairs beautifully with the sweet buttercream, cleansing the palate after a rich meal.
Common Mistakes to Avoid
Don’t let these simple errors ruin your Graduation Sheet Cakes.
- The “Cracked Earth” Surface:
- The Pitfall: Moving the cake board after frosting. Sheet cakes are long and flexible. If the board bends, the frosting cracks.
- The Fix: Always frost the cake on the final serving platter or a double-thick drum board that does not flex.
- Runny Writing:
- The Pitfall: Using gel coloring in a small amount of frosting without adding more powdered sugar.
- The Fix: Gel colors can loosen the icing structure. Always add a teaspoon of extra powdered sugar to your writing icing so it holds crisp lines.
- The “Bulging” Sides:
- The Pitfall: Frosting the sides too heavily.
- The Fix: Sheet cake sides should have a very thin layer of frosting. The focus is the top surface. Use a bench scraper to take almost all the frosting off the sides for a “semi-naked” look if you struggle with smoothing.
Storing Tips for the Recipe
Sheet cakes are durable, but air is the enemy of the cut edges.
- Pre-Party: Once frosted, the cake can sit at room temperature (covered with a cake box lid) for 3 days. The buttercream acts as a seal, keeping the sponge moist.
- Freezing: If you bake ahead, freeze the cake in the pan. Wrap the whole pan in plastic wrap. Thaw on the counter before frosting.
- Leftovers: Cut remaining cake into squares and place them in an airtight container separated by wax paper. Do not leave them exposed in the pan, or the cut edges will dry out overnight.
Conclusion
Mastering Graduation Sheet Cakes is about embracing the beauty of the canvas. By maximizing the surface area for your message and utilizing smart decorating hacks like the “toothpick trace,” you can create a professional-looking tribute to the Class of 2024 without the stress of stacking tiers. It is the smartest, most delicious way to feed a crowd.
Ready to decorate? Grab your offset spatula and let’s get to work! We want to see your school spirit designs. Tag us in your photos and leave a comment below with your graduate’s school colors. Don’t forget to subscribe for our next guide on “Party Planning on a Budget!”
FAQs
1. How many people does a 9×13 sheet cake feed? A standard 9×13 inch quarter sheet cake yields approximately 24 servings if cut into 2×2 inch squares. If you are serving smaller “event style” slices (1×2 inches), you can get up to 48 servings.
2. Can I combine two 9×13 cakes to make a bigger one? Yes! This is called a “Half Sheet.” Bake two 9×13 cakes, level them, and push them together on a large board. “Glue” the seam with buttercream before doing your crumb coat. No one will know it’s two cakes once frosted.
3. My writing looks shaky. Is there a cheat? Absolutely. Print your message on paper in a nice font. Place a piece of wax paper over it and trace the words with melted chocolate or candy melts. Let it harden in the fridge, then peel the letters off and place them on the cake.
4. How do I stop the cake from sliding on the board? Put a dab of buttercream on the board before you put the cake down. This acts as glue (mortar) and prevents the cake from sliding around while you are trying to frost it.
Your feedback helps other cooks succeed. Rate this recipe!
“Solved My Last-Minute Cake Panic!”
The party was in two days, and the bakery fell through. This tutorial was my salvation. Using a store-bought sheet cake as the base, I was able to transform it with homemade buttercream and the easy piping designs shown. The focus on simple, effective techniques meant I could decorate a beautiful, crowd-pleasing cake in under an hour. A total lifesaver.