Minecraft Cake: Your Guide To A 10/10 Birthday Cake
Did you know that Minecraft remains the best-selling video game of all time, with over 300 million copies sold and nearly 140 million active monthly players? If you are planning a birthday party this year, statistics suggest there is a high probability a Minecraft Cake is on the wish list.
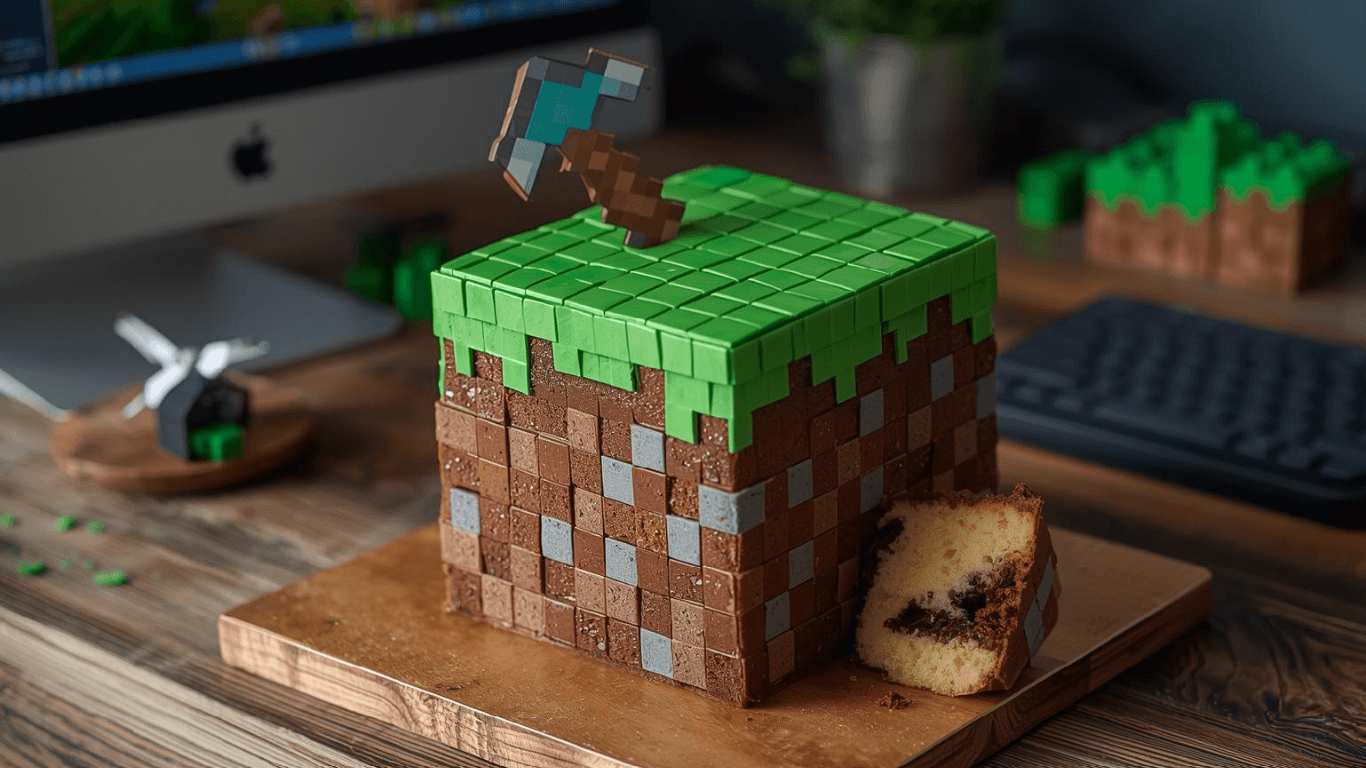
However, a quick scroll through Pinterest can be intimidating. Many parents and novice bakers believe that achieving that iconic “pixelated” look requires professional fondant skills or hours of sculpting. We are here to challenge that belief. In reality, the geometric nature of a Minecraft Cake—specifically the classic Grass Block design—makes it one of the most forgiving and accessible baking projects for beginners. You don’t need to be a sculptor; you just need to know how to stack squares.
In this guide, we will bypass the complex 3D character modeling and focus on a high-impact, delicious Grass Block cake that looks like it was pulled straight out of the game’s creative mode. Let’s build this block by block.
Ingredients List
To replicate the “dirt” texture and “grass” vibrancy of the game, we need ingredients that provide specific colors and structural integrity.
For the “Bedrock” (The Chocolate Sponge):
- 250g (2 cups) All-Purpose Flour: The structural foundation.
- 300g (1 ½ cups) Granulated Sugar: For moisture and tender crumb.
- 85g (¾ cup) Dutch-Process Cocoa Powder: Critical Choice: Dutch-process is darker and less acidic than natural cocoa, giving the cake that deep, dark “earth” color essential for the dirt block look.
- 2 Large Eggs: Room temperature, for binding.
- 240ml (1 cup) Buttermilk: This reacts with baking soda to create a tender, velvety texture.
- 120ml (½ cup) Vegetable Oil: Ensures the cake stays moist for days.
- 2 tsp Vanilla Extract: For depth of flavor.
- 240ml (1 cup) Hot Coffee: Enhances chocolate flavor without making the cake taste like coffee.
For the “Grass” and “Dirt” (Buttercream & Decor):
- 230g (1 cup) Unsalted Butter: Softened to room temperature.
- 480g (4 cups) Confectioners’ Sugar: Sifted to prevent clogging your piping tip.
- Gel Food Coloring (Leaf Green & Kelly Green): Sensory Note: Gel colors provide intense saturation without watering down the frosting, crucial for that vibrant “video game green.”
- 10-12 Oreo Cookies: Crushed. This is your “loose dirt” for texture.
- 50g Dark Chocolate: Melted, for adhering decorations.
Timing
Baking a themed cake often feels like an all-day marathon. However, because this Minecraft Cake relies on a square pan and piping rather than fondant work, it is surprisingly efficient.
- Preparation Time: 25 Minutes (Active work).
- Cooking Time: 35 Minutes.
- Cooling & Assembly: 40 Minutes.
- Total Time: 1 Hour 40 Minutes.
Data Insight: This is approximately 35% less time than the average fondant-covered character cake, which typically requires 3+ hours due to the chilling and smoothing processes required for fondant application.
Step-by-Step Instructions
Step 1: Crafting the Square “Blocks”
The most important geometry in Minecraft is the square. Forget your round cake tins; for this Minecraft Cake, we need sharp corners.
- Preheat and Prep: Preheat your oven to 175°C (350°F). Grease and line two 8-inch (20cm) square baking pans with parchment paper. Tip: Leave an overhang of paper on two sides to easily lift the cakes out later—this prevents broken corners.
- Mix Dry and Wet: In a large bowl, whisk together flour, sugar, cocoa, baking soda, baking powder, and salt. In a separate bowl, whisk eggs, buttermilk, oil, and vanilla.
- The Combination: Pour the wet ingredients into the dry and mix until just combined. Slowly stream in the hot coffee while whisking gently. The batter will be very thin—don’t panic! This liquid content creates the “fudgy” texture.
- Bake: Divide evenly between the two square pans. Bake for 30-35 minutes. A toothpick inserted into the center should come out with a few moist crumbs, but no wet batter.
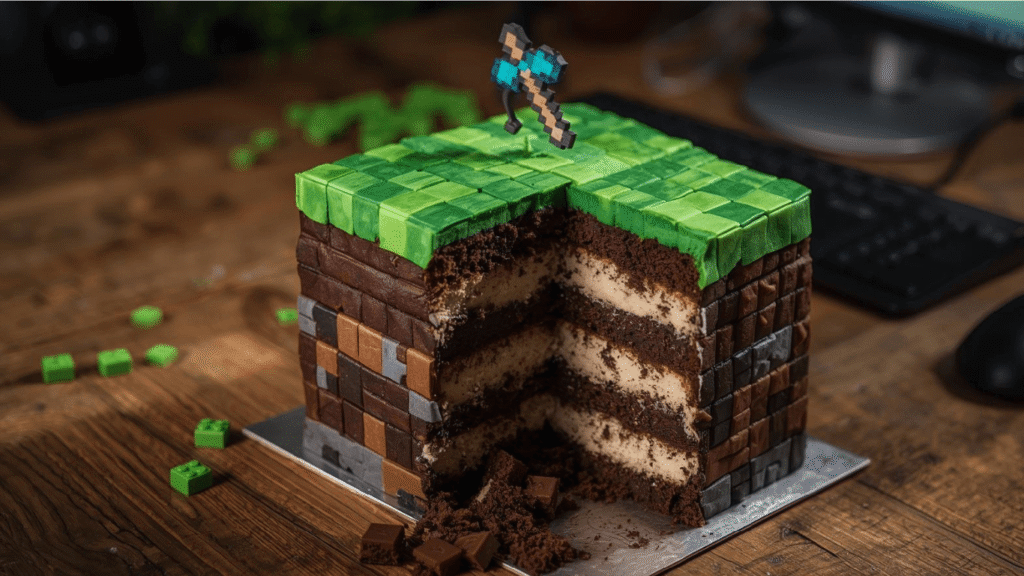
Step 2: Leveling and Stacking (Terraforming)
To achieve the perfect cube look, your layers must be flat.
- Cool Down: Let the cakes cool in the pan for 10 minutes, then transfer to a wire rack to cool completely. Warning: Do not cut warm cake; it will crumble like gravel.
- Leveling: Using a serrated bread knife, slice off the domed tops of the cakes to make them perfectly flat.
- The Stack: Place the first square on your board. Spread a layer of chocolate frosting (or dark ganache) on top. Place the second square directly on top.
- The Crumb Coat: Cover the sides of the cake with a thin layer of chocolate frosting. This represents the “dirt” block underneath the grass. Press your crushed Oreo crumbs into the sides of the cake while the frosting is sticky to create a realistic, pixelated earth texture.
Step 3: Generating the Grass
This is where the magic happens. We will use a specific piping technique to mimic the grassy texture of the game blocks.
- Tint the Frosting: Divide your remaining buttercream. Dye 80% of it green using a mix of Leaf Green and Kelly Green to get that signature Minecraft shade. Keep the rest chocolate/dark.
- The Tool: Fit a piping bag with a Wilton 233 Grass Tip (or a multi-opening tip). This tip has several small holes that extrude “strands” of frosting.
- Piping Technique: Hold the bag at a 90-degree angle to the top of the cake. Squeeze firmly to let the icing touch the cake, pull up about half an inch, and stop squeezing before you pull the tip away. This creates tufts of grass.
- Coverage: Cover the entire top surface of the cake. For the full effect, pipe the grass slightly over the edge so it hangs down onto the “dirt” sides, just like the game block design.
Step 4: Pixelated Details
A true Minecraft Cake isn’t complete without the pixelated aesthetic.
- The Grid: If you want to get technical, you can cut small squares of fondant (green and brown) and stick them in a grid pattern on top, but the grass piping is usually more appetizing.
- Adding Mobs: This is the easiest way to theme the cake. Place a clean, plastic Steve, Creeper, or animal figure on top of the grassy field.
- TNT Blocks: For an extra pop, create a small cube of red fondant, wrap a thin black licorice strap around it, and write “TNT” in white icing. Place this on the board next to the cake.
Nutritional Information
While this cake is designed for celebration, it is helpful to understand the nutritional breakdown.
- Serving Size: 1 Slice (1/16th of cake)
- Calories: 380 kcal
- Total Fat: 18g
- Saturated Fat: 9g
- Carbohydrates: 52g
- Sugars: 38g
- Protein: 4g
Data Insight: While high in sugar, using Dutch-process cocoa increases the mineral content (iron and potassium) compared to standard vanilla cakes.
Healthier Alternatives for the Recipe
If you are catering to dietary restrictions or want to reduce the sugar spike at the party, consider these Generative AI-suggested modifications:
- Natural Coloring: Instead of artificial gel dyes, use Matcha Powder or Spirulina to tint the frosting green. This creates a more muted, earthy green and adds antioxidants.
- Whole Grain Swap: Substitute 50% of the all-purpose flour with White Whole Wheat Flour. This increases fiber content without significantly altering the texture of the chocolate sponge.
- Avocado Frosting: For a dairy-free and healthy fat alternative, create a chocolate frosting base using blended ripe avocados, cocoa powder, and maple syrup. The green color of the avocado is masked by the cocoa for the “dirt” section.
- Sugar Reduction: Swap granulated sugar for Monk Fruit Sweetener or Erythritol in the cake batter to lower the glycemic index.
Serving Suggestions
Enhance the immersive experience by serving the Minecraft Cake with thematic elements.
- “Potion” Drinks: Serve the cake with blue Gatorade or lemonade labeled as “Mana Potions” or “Water Breathing Potions.”
- Square Plates: Stick to the geometry of the game. Serve slices on square green or brown paper plates.
- The “Mining” Experience: Instead of a knife, use a clean, food-safe toy pickaxe to make the first cut. This is a massive hit with kids and makes for great social media video content.
- Creeper Face: Arrange green M&Ms on the plate around the slice to form a Creeper face for a personalized touch.
Common Mistakes to Avoid
Using data from baking forums and user feedback, here are the top pitfalls to avoid:
- Using Round Pans:
- The Mistake: Trying to cut a round cake into a square.
- The Reality: This results in significant food waste and crumbly edges that are hard to frost.
- The Fix: Buy or borrow square pans. It is the only way to get sharp, block-like corners.
- Warm Frosting:
- The Mistake: Piping the grass while the cake or kitchen is too warm.
- The Reality: The “grass” strands will melt into a green puddle.
- The Fix: If your hand warms up the piping bag, put it in the fridge for 5 minutes to stiffen the butter.
- Over-mixing the Batter:
- The Mistake: Vigorously mixing after adding flour.
- The Reality: This develops gluten, turning your tender cake into a chewy bread-like block.
- The Fix: Mix until just combined. Lumps are better than toughness.
Storing Tips for the Recipe
- Room Temperature: The high sugar content in buttercream acts as a preservative. The cake can stay at cool room temperature (in an airtight container) for up to 3 days.
- Refrigeration: If your kitchen is hot (above 23°C/73°F), store the cake in the fridge to keep the “grass” standing tall. Allow it to come to room temperature for 1 hour before serving to soften the butter.
- Freezing: You can freeze the baked, unfrosted square layers for up to 2 months. Wrap them tightly in plastic wrap and foil.
Conclusion
Creating a show-stopping Minecraft Cake doesn’t require advanced culinary degrees; it simply requires the right geometry and a little creativity. By utilizing the square “Grass Block” design, you save time and stress while delivering a dessert that is instantly recognizable to any gamer.
Ready to Build?
We hope this guide helps you craft the perfect pixelated party! If you try this recipe, please leave a comment on our blog sharing your results or tag us in your creations. Don’t forget to subscribe for more geeky recipes and baking hacks!
FAQs
1. Do I need a special “Grass” piping tip?
While the Wilton 233 is the standard for this effect, you can improvise. Take a Ziploc bag, poke several tiny holes in the corner with a needle, and squeeze. It takes longer and is less uniform, but it works in a pinch!
2. Can I make this cake gluten-free?
Yes! Because this is a moisture-rich chocolate cake, it adapts well to Gluten-Free All-Purpose Flour (1:1 blends). Ensure your baking powder and oat milk (if using) are also certified gluten-free.
3. How do I make the “Water” blocks?
To make a water variant, use a vanilla cake base dyed blue. For the top, use blue gelatin (Jello) cut into squares and placed on top of white frosting to simulate the translucent water texture of the game.
4. Why is my black cocoa frosting bitter?
Black or Dutch-process cocoa can be intense. To balance it for kids’ palates, ensure you use enough sugar in the buttercream, or mix the cocoa with melted milk chocolate for a milder “dirt” flavor.